
QGISの地図帳機能を利用して、都道府県ごとの白地図を一括で作成する。

目的
現在進めているプロジェクトで、各都道府県の白地図をOGP画像として利用したい。
一括で作成できる方法を探していたところ、QGISの地図帳機能で実現できそうだった。
都道府県地図の入手と整理
地図のダウンロード
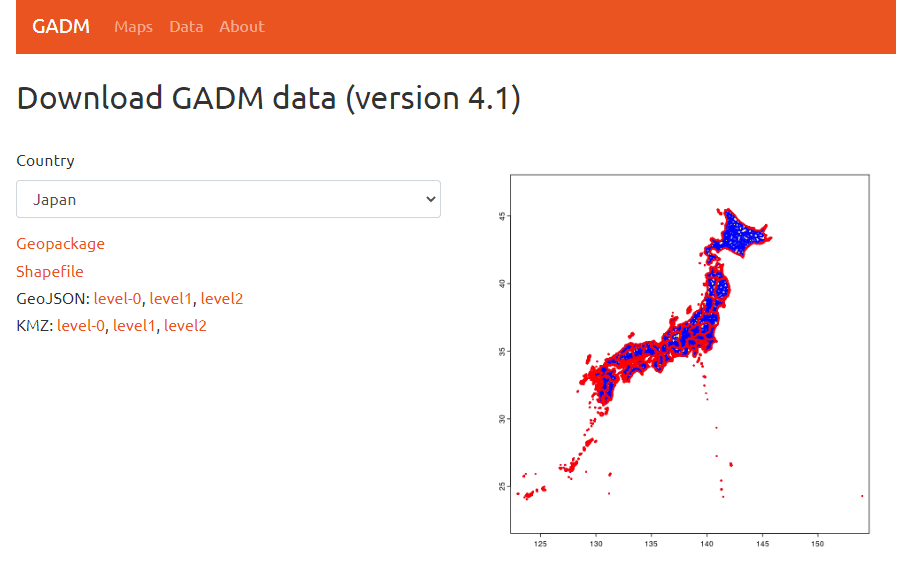
白地図のshapeファイルは下記サイトからダウンロードする。
Maps → Country → Japanを選択して、「Shapefile」をクリック。
QGISでの地図整理
ダウンロードしたフォルダを解凍すると、3つのshapeファイルが入っているので、とりあえず全てQGISにインポートする。
gadm41_JPN0:日本地図
gadm41_JPN1:都道府県地図
gadm41_JPN2:市区町村地図

都道府県レイヤの属性テーブルを確認してみると、兵庫県と長崎県のISO_1フィールドの値が空欄になっていたので、兵庫県は「JP-28」長崎県は「JP-42」を入力しておく。

印刷レイアウトの作成
「プロジェクト」→「新規レイアウト」を選択して、レイアウト名を入力する。仮に「地図帳(都道府県)としておいた。
新規レイアウト画面が開くので、まずは右下の「アイテムプロパティ」でページサイズを指定する。
OGP画像として利用したかったので、1200✕630pxに設定。
アイコンの「地図を追加」を選択して、用紙いっぱいに地図を表示。

地図帳の作成
右下の「地図帳」をクリックして、「地図帳を作成」にチェック。
カバレッジレイヤは『gadm41_JPN1』、ページ名称は『NL_NAME_1』、並べ方は『ISO_1』を選択する。

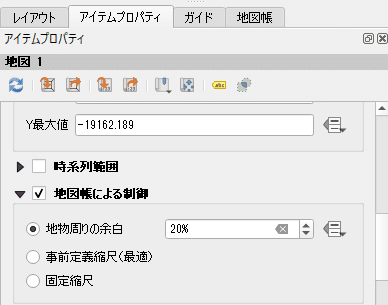
「アイテムプロパティ」タブを開き、「地図帳による制御」にチェック。
地物周りの余白は20%に設定しておく。
プレビューで確認
ツールバーの「地図帳」→「地図帳のプレビュー」で確認する。
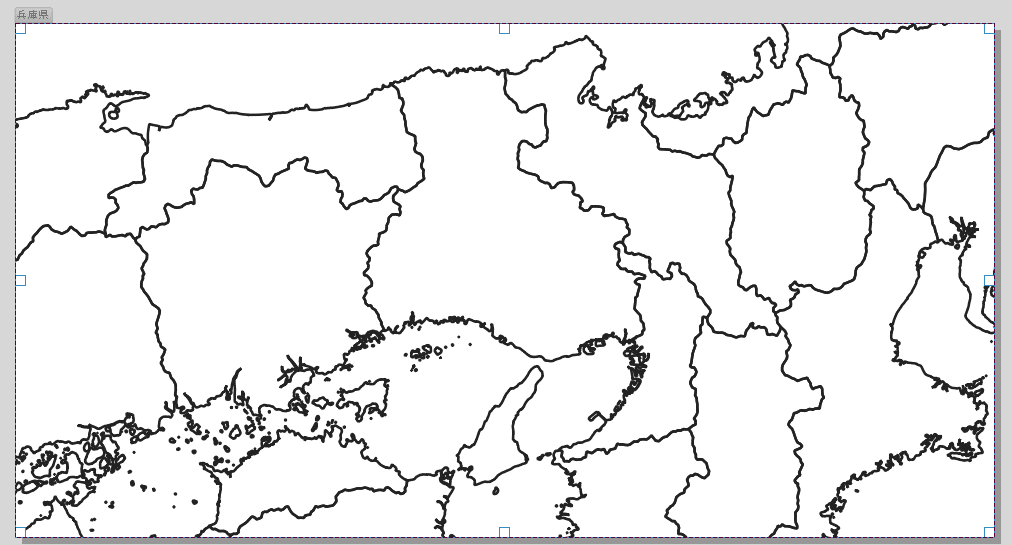
兵庫県を選択すると、兵庫県が中央に表示された地図帳が表示される。
青森県を選択した場合はこんな感じ。

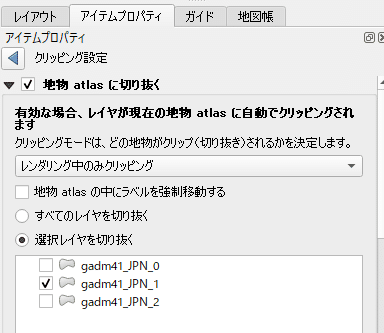
選択した都道府県のみ表示
選択した都道府県が中央に位置されているだけなので、選択以外の都道府県を非表示にしてみる。


エクスポート
あとは、ツールバーの「地図帳」から、画像、SVG、PDFの各形式でエクスポートできる。
選択した都道府県に着色
白地図では味気ないので、選択した都道府県に着色し、それ以外の都道府県は白地図のままの地図を作成してみる。
レイヤの複製
『gadm41_JPN1』レイヤを複製し、お気に入りの色で着色しておく。
ここでは仮に『地図帳(都道府県)』とした。

カバレッジレイヤ等の変更
先程作成した印刷レイアウトの画面で、「地図帳」の「カバレッジレイヤ」を『地図帳(都道府県)』に変更する。

「アイテムプロパティ」で選択レイヤを『地図帳(都道府県)』に変更する

これで、選択した都道府県のみ着色した白地図が完成する。


都道府県名の追加
せっかくなので、レイアウトに都道府県名も追加してみる。
印刷レイアウト画面で「テキストを追加」したあと、「アイテムプロパティ」→「フィールド」→『NL_NAME_1』を選択
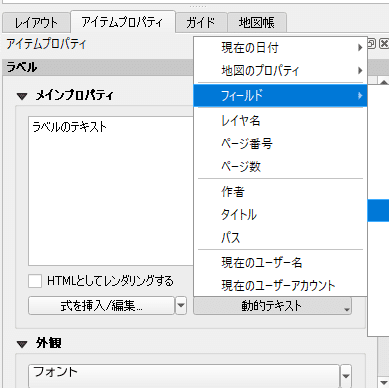
これで、印刷レイアウトに都道府県名が追加された。フォントや色等は好みの設定が可能。


QGISプロジェクト
これまでの作業を保存したQGISプロジェクトファイルを公開しています。