
【Python】ドローンの自動操縦をプログラミングする!

1. はじめに
こんにちは、今日は最近人気のあるドローンtelloをPythonでプログラミングしてみます。 とても簡単なので、皆さんもドローンを持っている方はぜひやってみてください。
最初は「Tello SDK」で試したですが、写真撮影の機能がなかったので、SDKの代わりに「djitellopy」を選びました。
2. Pythonとツールをインストールする(Windows)
2.1 新規インストール(3.8バージョン)
まず、Python3.8をのホームページにアクセスします。最新の3.11バージョンで試してみましたが、うまくいかなかったです。なので、「3.8」バージョンで行います。telloを制御するdjitellopyというライブラリが3.9までしかサポートしていないためです。
https://www.python.org/ftp/python/3.8.10/python-3.8.10-amd64.exe

インストルする時は、必ず「Add Python 3.8 to P ATH」にチェックしてください!!!
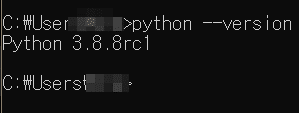
インストルが終わったら、コマンドで「python --version」を入力し、バージョンを確認します。
➞「2.3 djitellopyとvscodeへ」
2.2 すでにPython3.10以上がインストールされた場合
コントロールパネルからPythonプログラムを削除します。

python3.8をダウンロードして下記のようにインストールします。
https://www.python.org/ftp/python/3.8.10/python-3.8.10-amd64.exe

環境変数 > システム環境変数 > Pathで3.8バージョンを確認します。もしPathにPython3.8がない場合は、コマンド入力画面で「where python」と入力してPython3.8がインストールされたパスを追加します。(Python 3.10以上の既存バージョンがパスにある場合は削除して、Python 3.8バージョンのパスに置き換えます。)

Python3.8のパスが追加されたら、コマンドウィンドウに「pip install djitellopy」と入力してライブラリをダウンロードします。
2.3 djitellopyとvscodeのインストール
pip install djitellopyでは、コマンドで「pip install djitellopy」を入力し、djitellopyをインストールします。
*もし、pipができない場合、環境変数で 「Scripts」が追加されたのか、確認してください。

次はPythonコードを作成するために、VSCodeをインストールします。
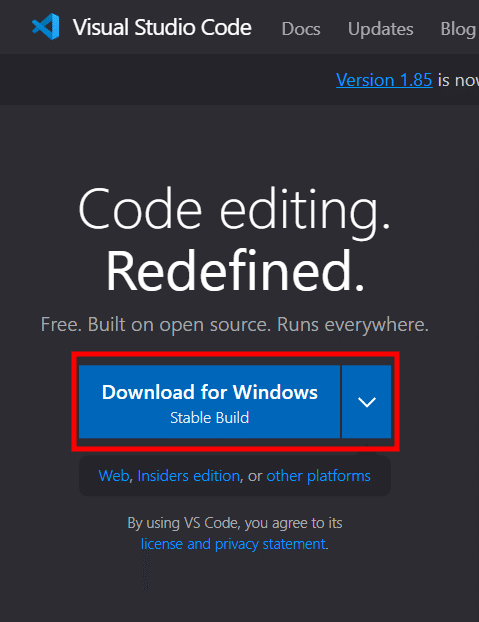
「Download」ボタンをおして、VSCodeをインストルします。
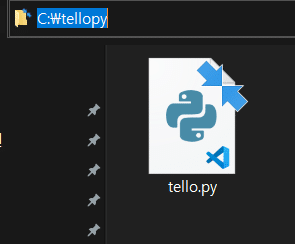
今からは、VSCodeが読み込むフォルダーを掘り下げます。「Cドライブ」に「tellopy」というフォルダーを作ってください。
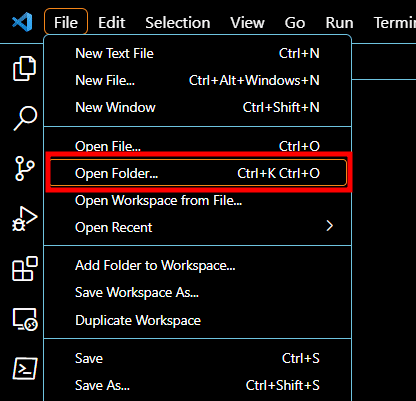
VSCodeを実行し、「File」タップの「Open Folder」をクリックします。

「tellopy」フォルダーを開きます。
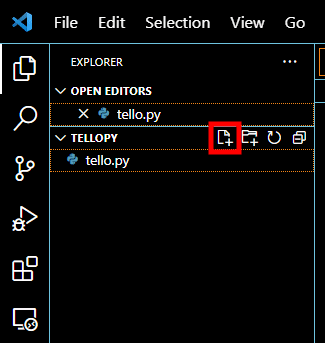
赤い四角を押し、「tello.py」 というファイルを作ります。
3. Pythonとツールをインストールする(Mac)
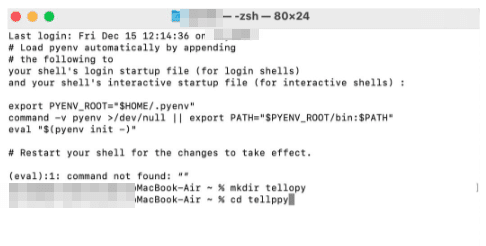
3.1 tellopyフォルダが作成

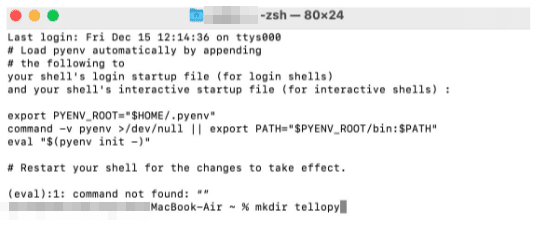
*tellopyフォルダが作成されます。
3.2 仮想環境を作る
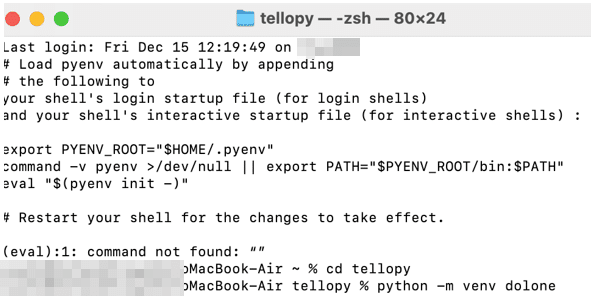


*アップグレードしないと、この後のdjitellopyインストールがエラーになります。

4. ドローンを操縦するコード作成する
4.1 連結・離陸・待機・着陸
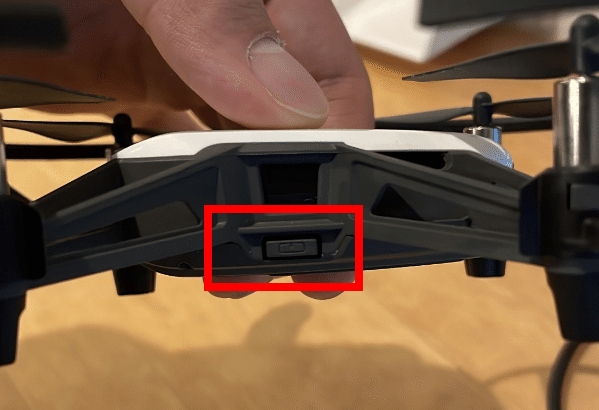
まず、どろんのスイッチを押して、立ち上げます。

TELLOのWi-Fiに接続します。
<連結・離陸・待機・着陸のサンプルコード>
import time
import cv2
from djitellopy import Tello

tello = Tello()
tello.connect()

tello.takeoff()

time.sleep(5)
tello.land()
これからは、先ほど作った「tello.py」に直接Pythonコードを作成します。
まず、「time」、「cv2」、「djitellopy」をインポートします。
ここでcv2はopencvは画像を処理するライブラリです。 timeはPythonモジュールで、時間に関連した機能を提供します。ここではsleepという機能を使って関数と関数の間に一定の間隔を置く目的でインポートしました。
「Tello()」を書いて、オブジェクトを生成します。
「connect()」関数を呼び出して、ドロンをパソコンに接続します。
「tello.takeoff()」はTelloドローンを離陸させるコマンドです。ドローンを空中に飛び立たせます。
「time.sleep(5)」はプログラムを5秒間停止するコマンドです。指定した秒数の間、次のコマンドの実行を待ちます。
「tello.land()」はTelloドローンを着陸させるコマンドです。ドローンを安全に地面に着陸させます。
4.2 上昇・下降
tello.takeoff()

time.sleep(5)
tello.move_up(50)

time.sleep(5)
tello.move_down(50)

time.sleep(5)
tello.land()
「tello.move_up(50)」はTelloドローンを上昇させるコマンドです。高度50センチメートルで上昇します。
「tello.move_down(50)」はTelloドローンを下降させるコマンドです。高度50センチメートルで下降します。
4.3 前後左右移動
tello.move_forward(100)

time.sleep(5)
tello.move_back(100)
「tello.move_forward(100)」コマンドは、Telloドローンを前方に移動させるコマンドです。100センチメートルだけ、ドローンを前進させます。
「tello.move_back(100)」コマンドは、Telloドローンを後方に移動させるコマンドです。100センチメートルだけ、ドローンを後退させます。
tello.move_left(100)

time.sleep(5)
tello.move_right(100)
「tello.move_left(100)」はTelloドローンを左に移動させるコマンドです。100センチメートルだけ、ドローンを左に移動させます。
「tello.move_right(100)」はTelloドローンを右に移動させるコマンドです。100センチメートルだけ、ドローンを右に移動させます。
4.4 左折・右折・フリップ
tello.rotate_counter_clockwise(90)

time.sleep(5)
tello.rotate_clockwwise(90)

time.sleep(5)
tello.flip_back()
「tello.rotate_counter_clockwise(90)」はTelloドローンを反時計回りに回転させるコマンドです。指定された角度(90度)だけ、ドローンを左に回転させます。
「tello.rotate_clockwwise(90)」はTelloドローンを時計回りに回転させるコマンドです。指定された角度(90度)だけ、ドローンを右に回転させます。
「tello.flip_back()」はTello ドローンの後方に対してフリップ(空中での回転-宙返り)を行うコマンドです。
4.5 写真撮影
tello.streamon()
frame_read = tello.get_frame_read()
cv2.imwrite("picture1.png", frame_read.frame)

time.sleep(3)
tello.streamon()
frame_read = tello.get_frame_read()
cv2.imwrite("picture2.png", frame_read.frame)
Telloドローンのビデオストリームを開始し、そのストリームから1フレームをキャプチャして、それを画像として保存します。
***写真撮影は一つ目はなぜか黒画面になっていまうので、二つ目の撮影から、うまくいきます。
「tello.streamon()」コマンドは、Telloドローンのビデオストリームを開始するためのものです。これにより、ドローンのカメラからの映像ストリームが利用可能になります。
「frame_read = tello.get_frame_read()」は、Telloドローンからのフレームを読み取るためのコマンドです。get_frame_read()関数は、現在のフレームを取得するためのFrameReadオブジェクトを返します。
「cv2.imwrite("picture1.png", frame_read.frame)」は、frame_readから取得したフレームを画像として保存するコマンドです。cv2.imwrite()関数を使用して、取得したフレームを "picture1.png" という名前の画像ファイルとして保存します。
4.6 起動
C:\tellopy>python tello.pyコマンドでパスをCドライブのtellopyがある場所に合わせ、「python tello.py」と打つとドローンが動作します。
起動時注意!!
周囲の空間や危険なものがないことを必ず確認して起動させてください。思ったより音が大きく、ぶつかったら危険な場合がありますので、必ず安全に使用してください。
5. 終わり
今までPythonでドローンの基本的な移動から派手なバックフリップ、写真撮影まで行いました。 このように、Pythonは機械動作にも命令を出すことができることがわかりました。 とても興味深く、これからどんな動作ができるのか、さらに楽しみです。
下記のコードは今までやった全てのコードをまとめたものです。 このまま実行すると周辺物体と衝突する可能性があるので、必ず周辺空間と物体を把握した上でコードを修正して使用してください。
import time
import cv2
from djitellopy import Tello

# テロを初期化し、接続します
tello = Tello()
tello.connect()

# 離陸します
tello.takeoff()

time.sleep(5)
# 上昇します
tello.move_up(50)

time.sleep(5)
# 下降します
tello.move_down(50)

time.sleep(5)
# 前方に移動します
tello.move_forward(100)

time.sleep(5)
# 後方に移動します
tello.move_back(100)

time.sleep(5)
# 左に移動します
tello.move_left(100)

time.sleep(5)
# 右に移動します
tello.move_right(100)

time.sleep(5)
# 反時計回りに90度回転します
tello.rotate_counter_clockwise(90)

time.sleep(5)
# 時計回りに90度回転します
tello.rotate_clockwwise(90)

time.sleep(5)
# 後方宙返りを行います
tello.flip_back()

time.sleep(5)
# ストリームを開始し、画像を取得して保存します
tello.streamon()
frame_read = tello.get_frame_read()
cv2.imwrite("picture1.png", frame_read.frame)

time.sleep(5)
# ストリームを再度開始し、画像を取得して保存します
tello.streamon()
frame_read = tello.get_frame_read()
cv2.imwrite("picture2.png", frame_read.frame)

time.sleep(5)
# 着陸します
tello.land()
エンジニアファーストの会社 株式会社CRE-CO
ソンさん
【参考】