WindowsでPythonをソースコードからビルド(Proxy環境下で)

レアケースかもしれませんが自分の備忘録を兼ねて。
ざっくりとした手順
1.Pythonのソースコードのダウンロードと解凍
2.cmakeのダウンロードとインストール
3.VisualStudioCommunity2019のダウンロードとインストール
4.システムの環境変数にプロキシを設定
5.Pythonのビルド
6.pipのダウンロード
7.PATHの設定
8.cmakeとVisualStudioのアンインストール(今後使わない人のみ)
どんな人にこの記事が必要?
PythonをWindowsで使う場合、インストーラーが公式で配布されています。最新版に対してはインストーラーがあるのでいいですが、旧バージョンのセキュリティ対応版では、インストーラーは配布されず、ソースコードのみの配布となっています。もちろん、最新版の開発に貢献したい人もソースコードからのビルドは必要かもしれませんが、旧バージョンを使う必要がある人で、セキュリティアップデートで配布されたソースコードを使いたい。しかもWindowsで。という人を想定しています。
なお、手順の整理にあたっては、下記の内容を参考にさせてもらいました。これに対してProxy環境下でハマった部分を回避した手順を整理しました。(なるべくコマンドでダウンロードするのではなく、予めブラウザ経由でダウンロードしておくという流れです。)
Python 最新版のインストール(ソースコードを使用)(Windows 上) (kkaneko.jp)
以下、手順となりますが、全ての環境での動作を保証するものではありません。
1.Pythonのソースコードのダウンロードと解凍
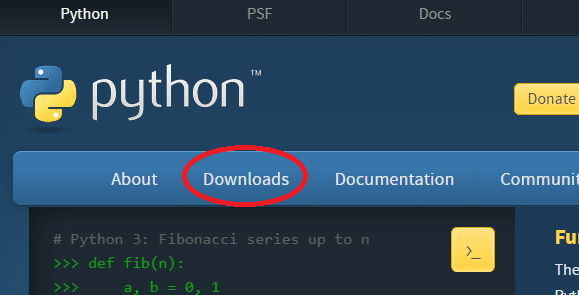
Pythonの公式サイトにアクセス。下記のDownloadsをクリック
現在ダウンロードできる一覧が表示。希望するバージョンを選ぶ
(ここでは3.9.16を選択)
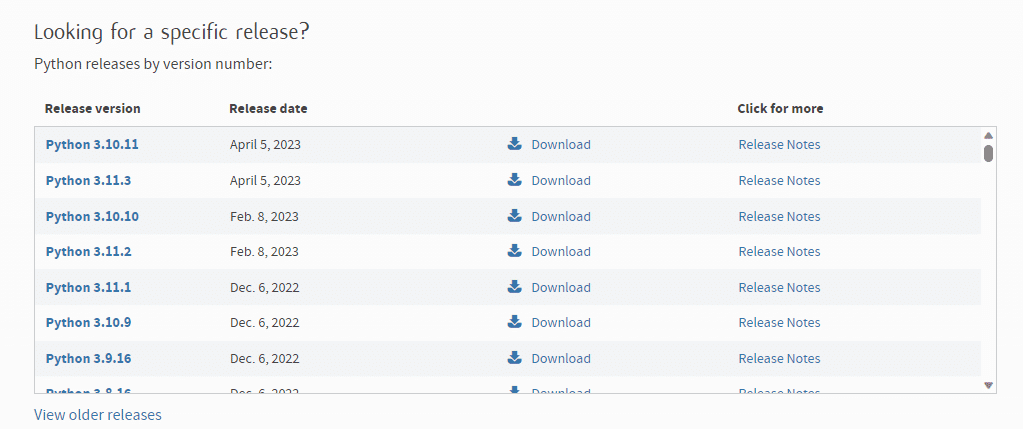
Gzipped source tarballを選択しダウンロードする。

Powershellを開く
Windows10:スタート→WindowsPowerShell
Windows11:スタートボタンを右クリック→Terminal
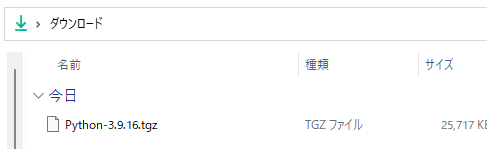
ダウンロードフォルダに移動
(デフォルトなら、C:\Users\<username>\Downloads)
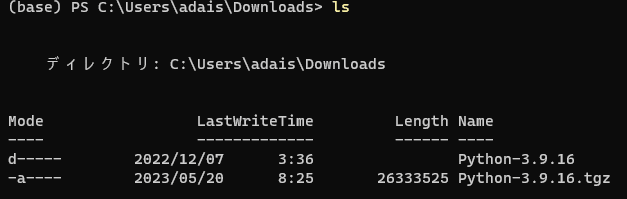
(base) PS C:\Users\adais> cd .\Downloads\ダウンロードしたファイルを解凍
(base) PS C:\Users\adais\Downloads> tar -xzvf .\Python-3.9.16.tgzディレクトリ内にフォルダが作成される
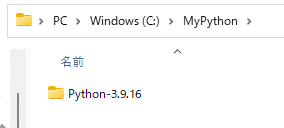
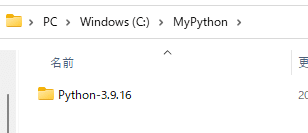
このとき作成されたフォルダ内に、最終的にPythonの実行ファイルが作成されます。そのため、自分が今後管理しやすい場所に、このフォルダを移動します。(例えば、C:¥MyPythonを作成し、その中に移動)
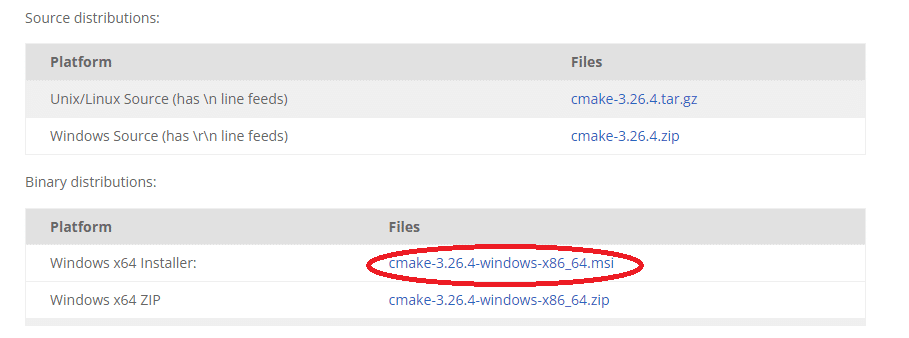
2.cmakeのダウンロードとインストール
公式サイトにアクセス。下記のmsiファイルをダウンロード
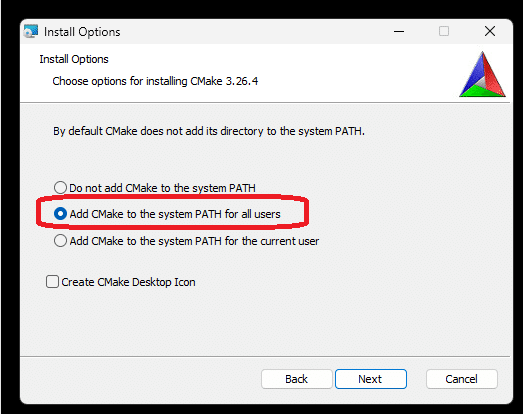
ダウンロードしたファイルをインストールする。基本的にはNext連打だが、InstallOptionsのところでは、下記を選択する。
3.VisualStudioCommunity2019のダウンロードとインストール
公式サイトにアクセス。サインインが必要なので右上の人のアイコンをクリックしてサインインする。

サインインすると、Dwonsloadsページから飛ばされるので、もう一度公式サイトにアクセスし、2019を開いて下記のダウンロードをクリック

No key requiredのDownloadを選択

自動的にダウンロードされるが、

というファイルがダウンロードできない場合は、画面内の下記のリンクをクリックしてダウンロードする。
ダウンロードしたファイルを実行してインストールする。
基本的には画面指示に従い進める。
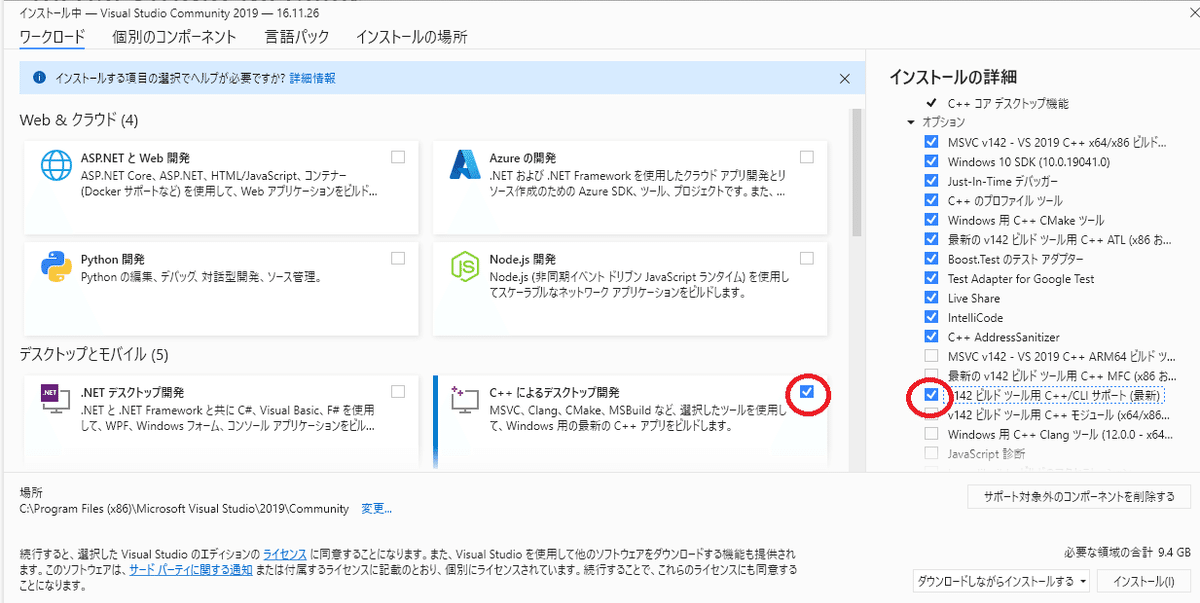
下記画面では、C++によるデスクトップ開発にチェックを入れる。
チェックを入れると、右側にオプションが表示されるので、下図に従いチェックを追加し、右下のインストールをクリックする。
4.システムの環境変数にプロキシを設定
プロキシ環境下では、システムの環境変数にプロキシを設定する。
変数名:http_proxy
値:http://<ID>:<Pass>@<HTTPプロキシサーバーアドレス>:<ポート番号>
変数名:https_proxy
値:http://<ID>:<Pass>@<HTTPSプロキシサーバーアドレス>:<ポート番号>
5.Pythonのビルド
1.で解凍したフォルダ(Python-3.9.16)が、C:¥MyPythonに移動されている状態として、以下を記載します。(下記のようになっている)
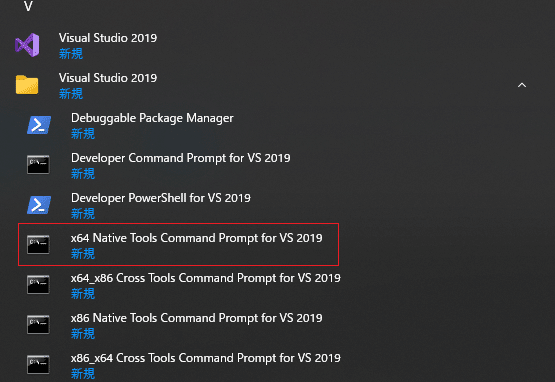
スタートメニューから VisualStudio2019→x64 Native Tools Command Prompt for VS2019を起動しておく
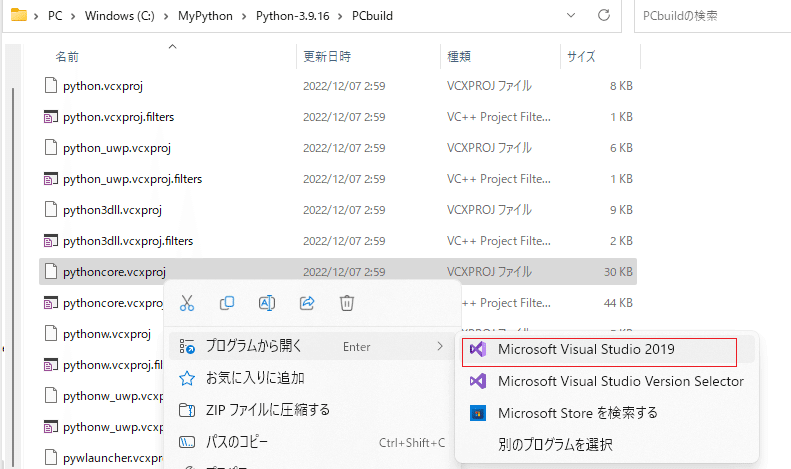
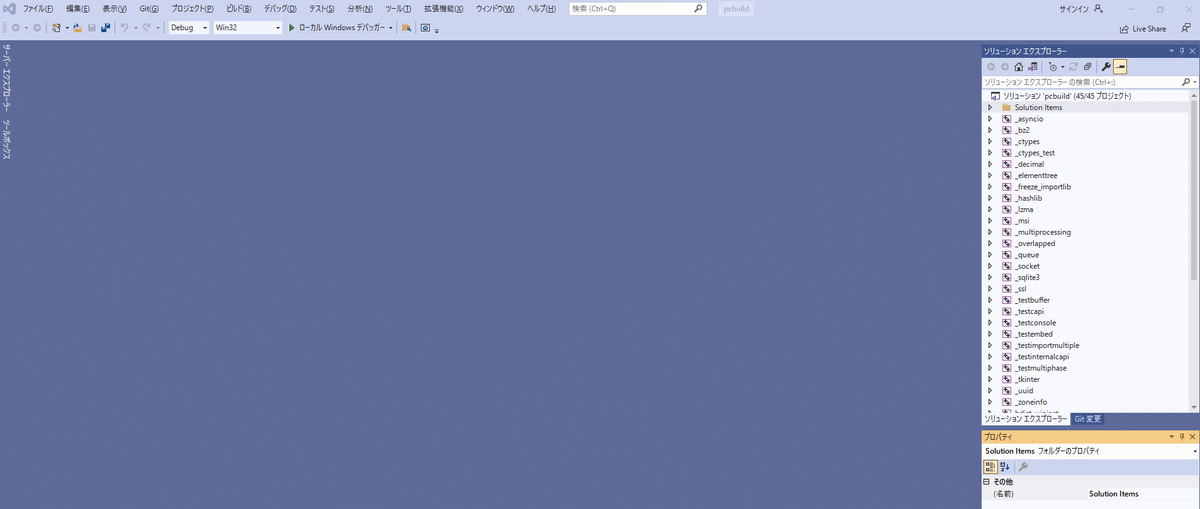
C:¥MyPython¥Python-3.9.16¥PCbuild¥pythoncore.vcxprojを右クリックし、下記のようにVisualStudioで開く。
こんな画面になる。
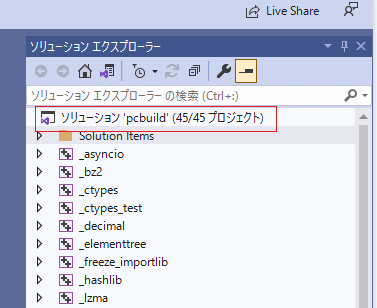
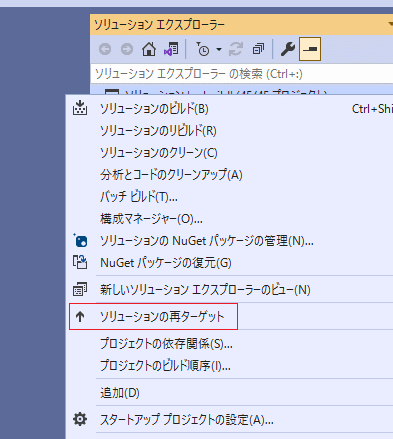
右側のソリューションを右クリック。
ソリューションの再ターゲットをクリック→OK
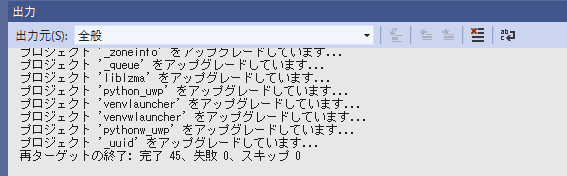
画面下に、再ターゲットの終了と表示されるのを確認
x64 Native Tools Command Prompt for VS2019で、C:¥MyPython¥Python-3.9.16に移動。
C:\Program Files (x86)\Microsoft Visual Studio\2019\Community>cd c:\MyPython\Python-3.9.16PCbuildにあるbuild.batを実行
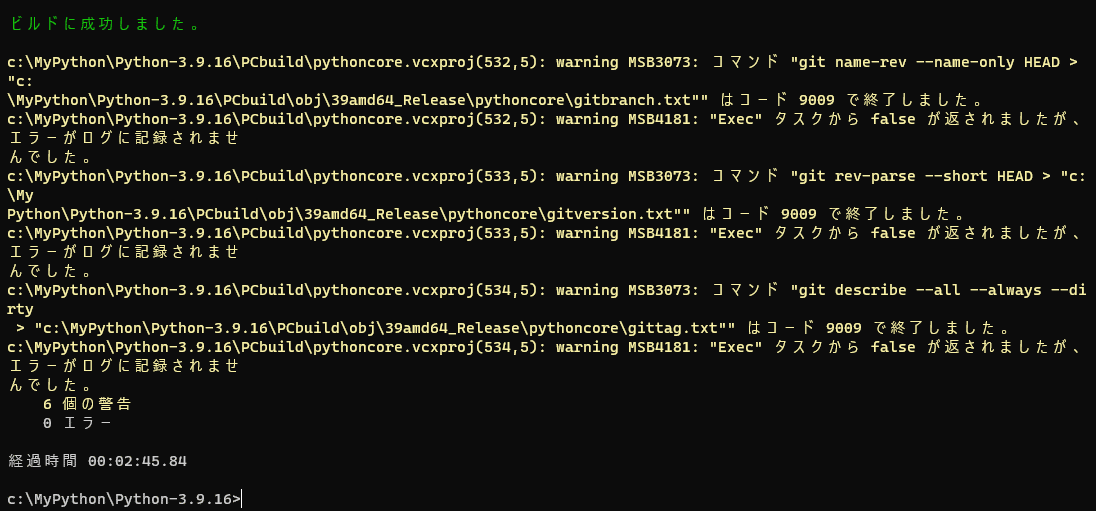
c:\MyPython\Python-3.9.16>PCbuild\build.bat今回のインストールではgitを入れていないので下記のエラーが出るが、ビルドそのものは成功。
ビルドしたものは、C:\MyPython\Python-3.9.16\PCbuild\amd64に存在するので、pythonを実行するときは
C:\MyPython\Python-3.9.16\PCbuild\amd64\python.exe
のファイルを実行する。
6.pipのダウンロードと実行
https://bootstrap.pypa.ioにアクセス。get-pip.pyをダウンロード。
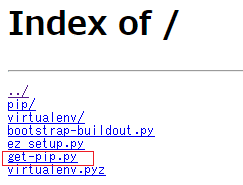
C:\MyPython\Python-3.9.16\PCbuild\amd64\に、get-pip.pyを格納。
PowerShellでC:\MyPython\Python-3.9.16\PCbuild\amd64\にカレントディレクトリを移動し、下記を実行。
(base) PS C:\MyPython\Python-3.9.16\PCbuild\amd64> .\python.exe .\get-pip.py
7.PATHの設定
システムの環境変数に以下を追加する
C:\MyPython\Python-3.9.16\Scripts
C:\MyPython\Python-3.9.16\PCbuild\amd64
8.cmakeとVisualStudioのアンインストール(今後使わない人のみ)
pythonがビルドできた後は、cmakeとVisualStudioは不要なので、他に使う予定がなければアンインストールしても問題ない。