
Photo by
kezama
ArduinoとSTM32マイコンをつないでマイコンシステム開発をしてみる その31 ~単体テスト②~

マイコンシステム開発の要件定義から総合テストまでの工程をたどってみます。
題材としては、空調管理システムにします。
機材はいま手元にあるArduino1台とSTM32マイコン1台を使います。


単体テスト仕様書にそってテストを行います
前回のつづきです
前回の記事
テストケース
2.switch_handler() のテストケース
正常系

ボタン割り込みの設定をおこない、ボタンを押してみます
#include <SPI.h>
#include "AirConLib2.h"
void switch_handler() {
switch (state) {
case 0: // 通常モード
state = 1;
break;
case 1: // 温度設定モード
state = 2;
break;
case 2: // 冷暖房設定モード
state = 0;
break;
}
}
void setup() {
Serial.begin(9600);
SPCR |= _BV(SPE); // SPI Enable
SPCR &= ~_BV(MSTR); // スレーブモード
// 割り込みでデータ受信
SPCR |= _BV(SPIE);
// ボタン割り込みの設定
attachInterrupt(digitalPinToInterrupt(pinButton), switch_handler, RISING);
}
void loop() {
// シリアルモニタに状態を出力
Serial.print("State: ");
Serial.println(state);
delay(100);
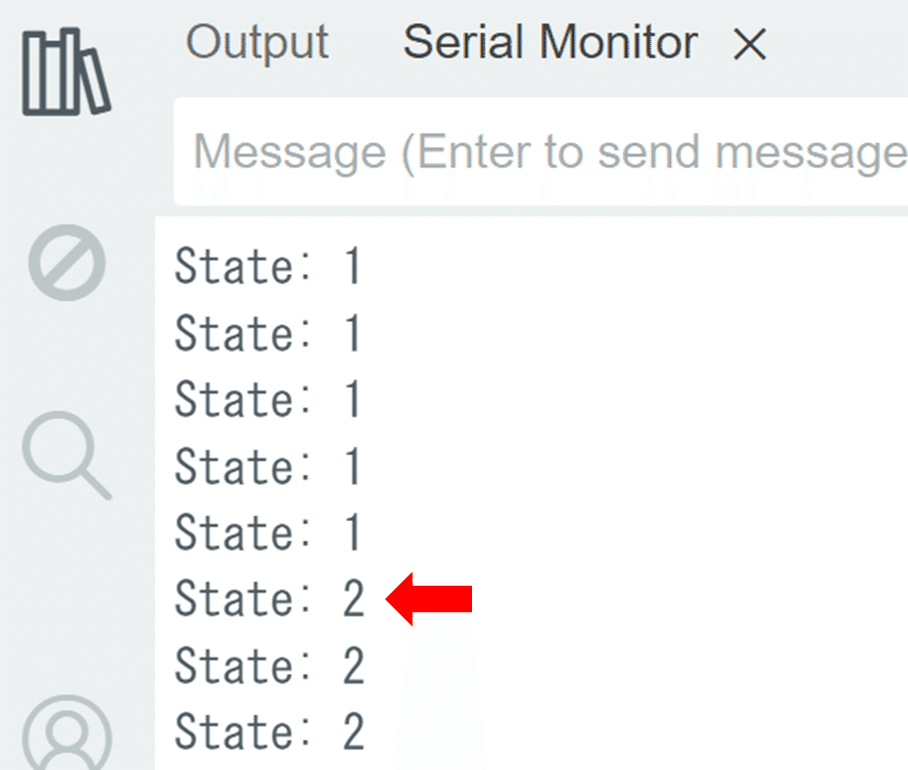
}① 通常モード(0)でボタンを押すと、温度設定モード(1)に遷移しました

② 温度設定モード(1)でボタンを押すと、冷暖房設定モード(2)に遷移しました
③ 冷暖房設定モード(2)でボタンを押すと、通常モード(0)に遷移しました

④ 3回ボタンを連打しましたが、正常に状態遷移しています
