【AWS + Swift】 API Gateway + Lambda + SNS でEメール通知機能を実装してみた。

はじめに
本記事は、API Gateway + Lambda + SNSを使用したEメール通知機能の実装を紹介します。
以下、使用した各サービスの概要を簡単に説明します。
API Gateway
Amazon API Gateway は、あらゆる規模の REST、HTTP、および WebSocket API を作成、公開、維持、モニタリング、およびセキュア化するための AWS のサービスです。
https://docs.aws.amazon.com/ja_jp/apigateway/latest/developerguide/welcome.html
Lambda
Lambda はサーバーをプロビジョニングしたり管理しなくてもコードを実行できるコンピューティングサービスです。
https://docs.aws.amazon.com/ja_jp/ja_jp/lambda/latest/dg/welcome.html
SNS
Amazon Simple Notification Service (Amazon SNS) は、配信者から受信者 (または生産者から消費者) へのメッセージ配信を提供するマネージドサービスです。発行者は、論理アクセスポイントおよび通信チャネルであるトピックにメッセージを送信することで、受信者と非同期的に通信します。クライアントは、Amazon Kinesis Data Firehose、Amazon SQS、AWS Lambda、HTTP、E メール、モバイルプッシュ通知、モバイルテキストメッセージ (SMS) などのサポートされたエンドポイントを使用して SNS トピックにサブスクライブし発行されたメッセージを受信できます。
https://docs.aws.amazon.com/ja_jp/sns/latest/dg/welcome.html
使用環境
● OS:macOS Big Sur 11.3.1
● Xcode:12.5
● Swift:5.4
● Postman
実装
AWS側
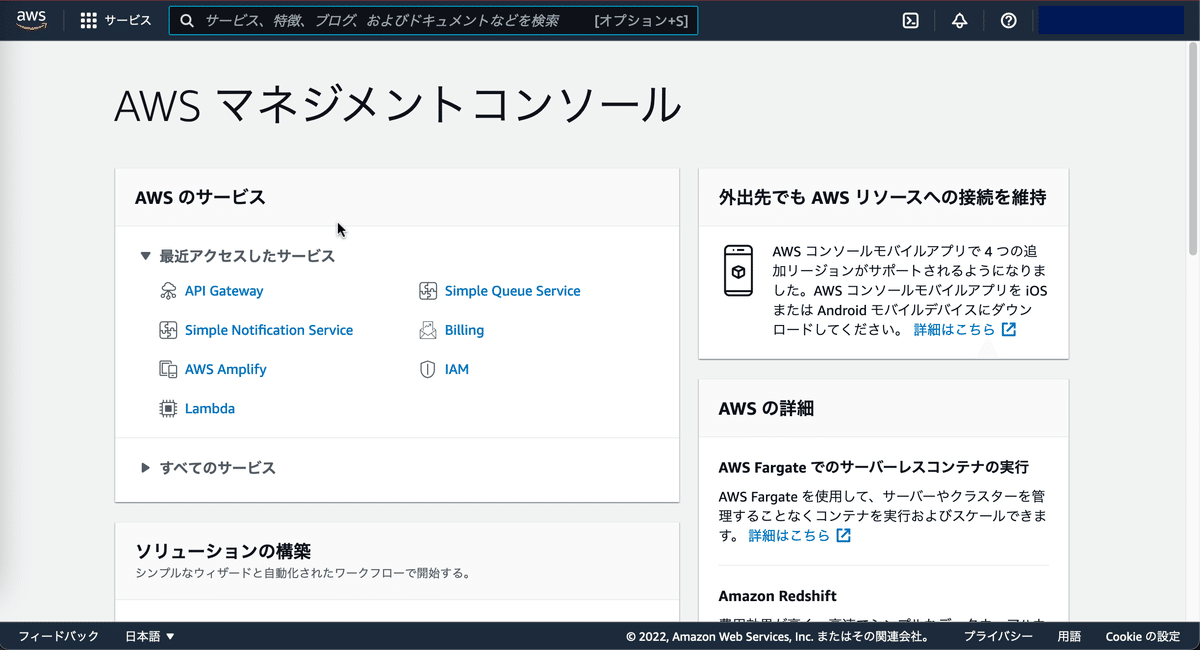
1、AWSマネジメントコンソールのページへ飛ぶ。
URL ⇨ https://aws.amazon.com/jp/console/
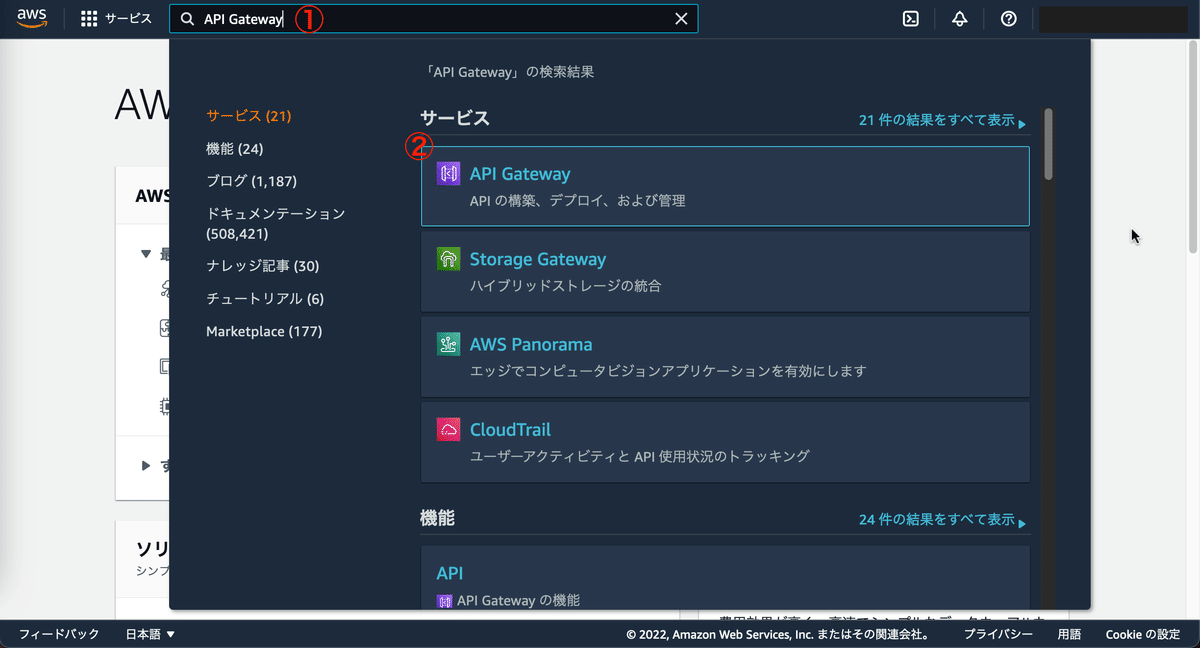
2、検索欄に「API Gateway」と入力し、一覧から【API Gateway】を押下する。
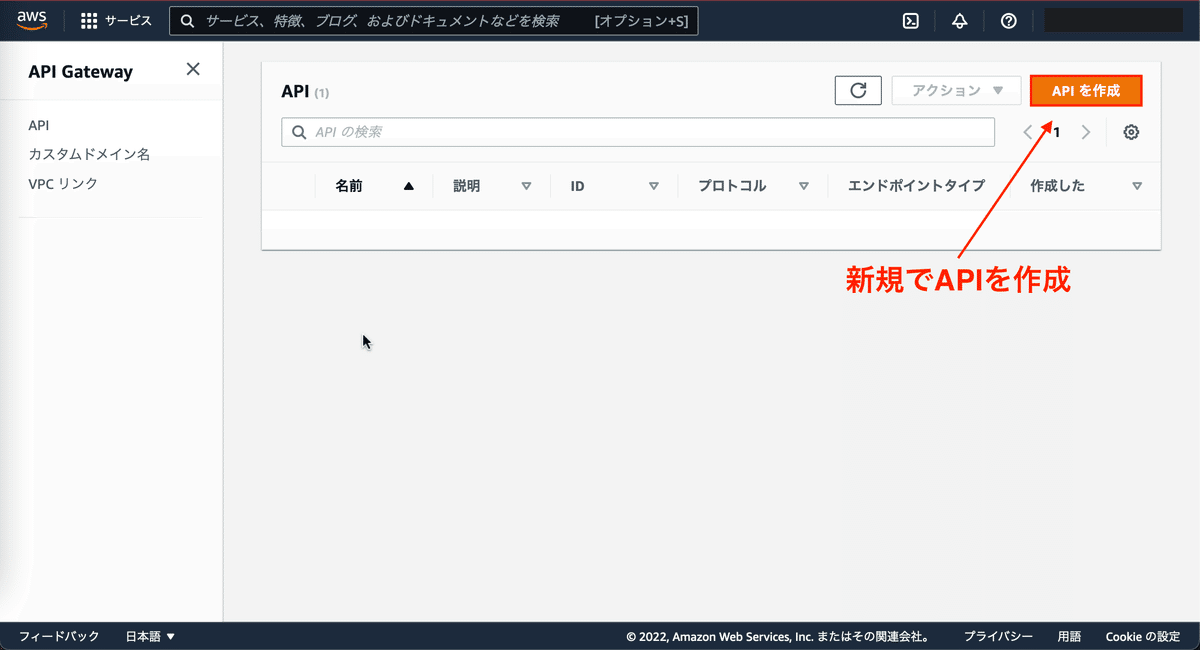
3、【APIを作成】ボタンを押下する。
4、APIタイプ選択一覧の【REST API】を選択する。

5、各項目を下記の画像の様に設定し、【APIの作成】を押下する。

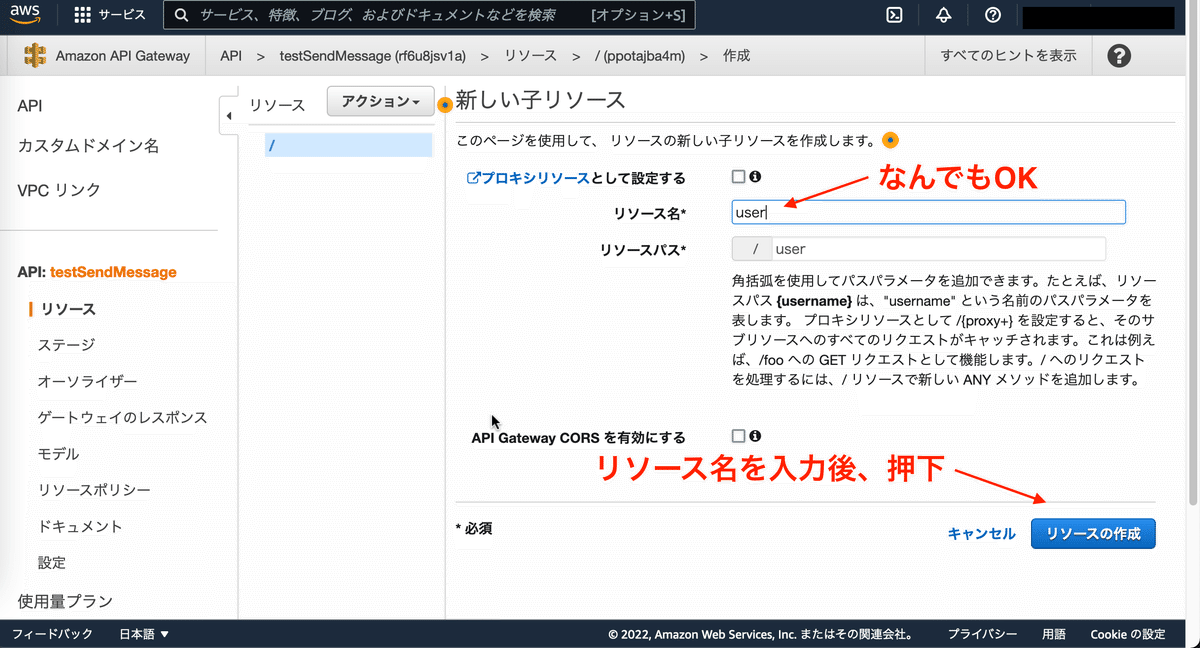
6、リソース設定画面の【アクション】⇨【リソースの作成】の順にリソース作成画面に遷移し、リソース名を入力する。

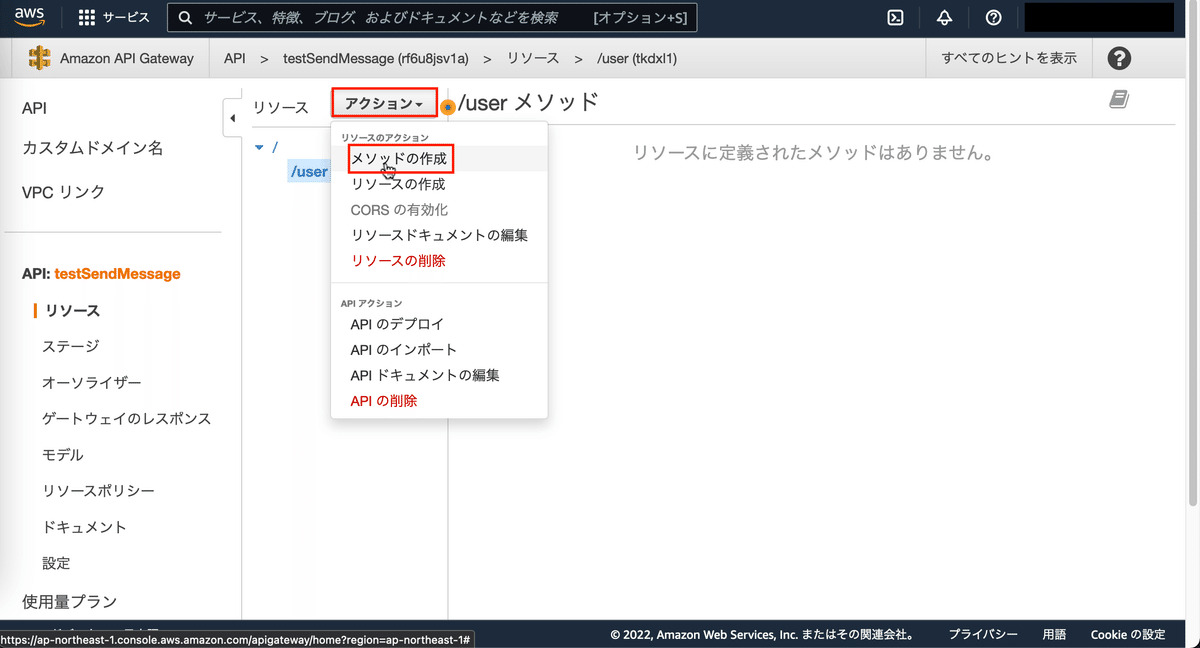
7、【アクション】⇨【メソッドの作成】⇨【POST】⇨【✅】の順に選択する。

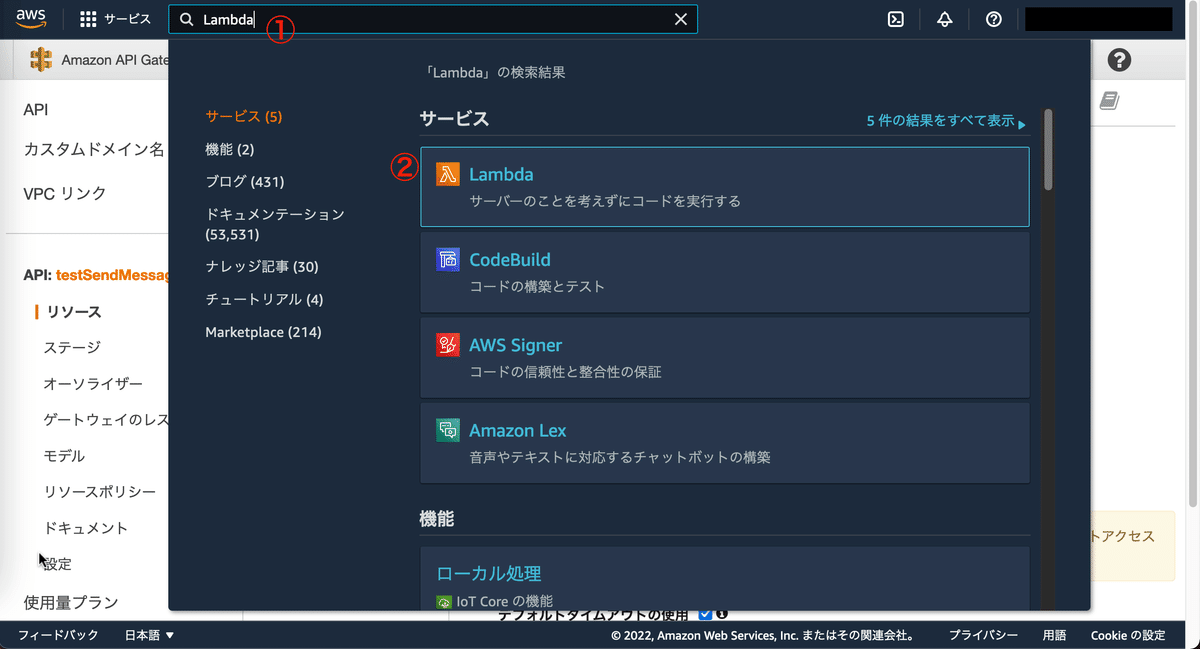
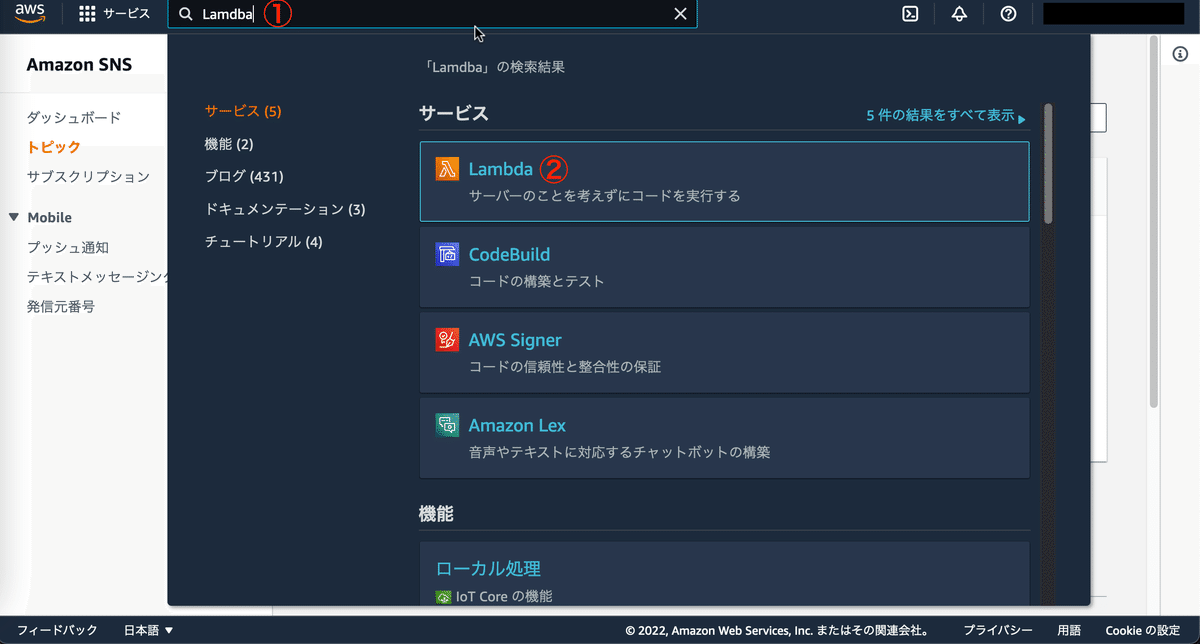
8、検索欄に「Lambda」と入力し、一覧から【Lambda】を押下する。
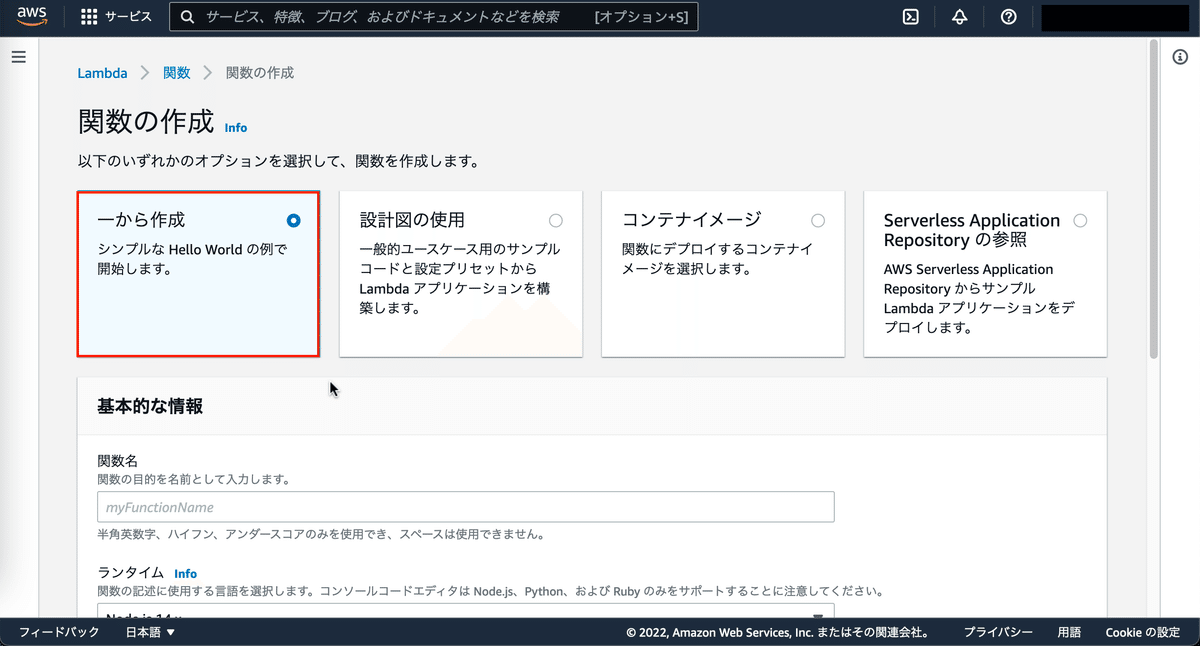
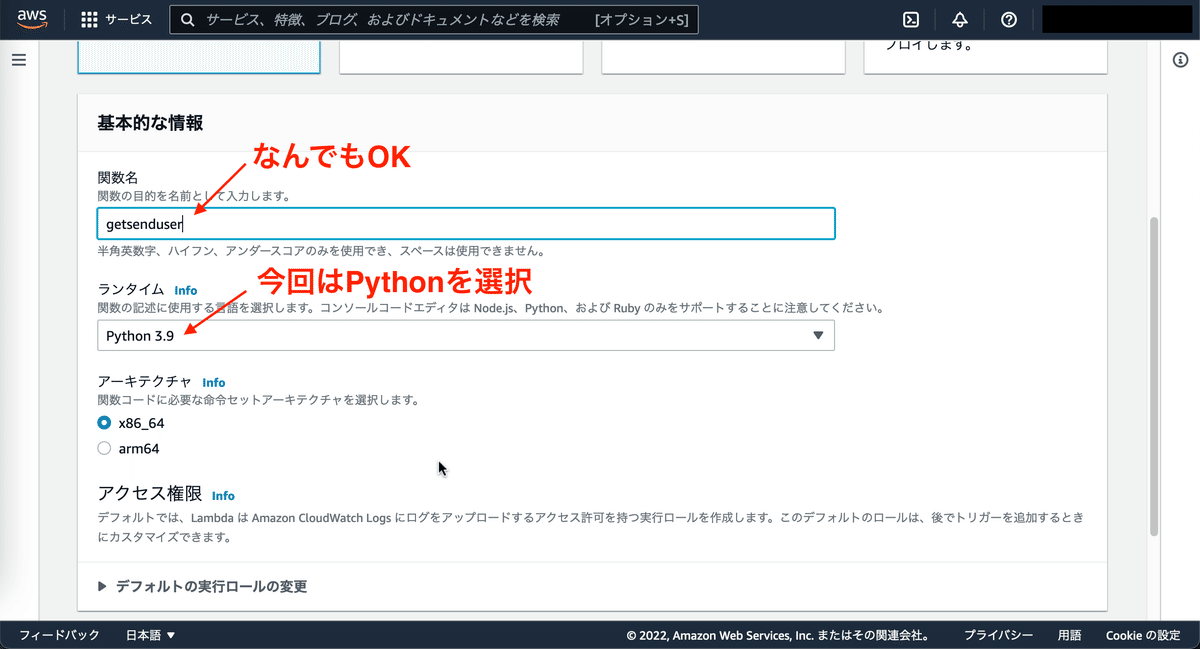
9、【関数の作成】を押下する。

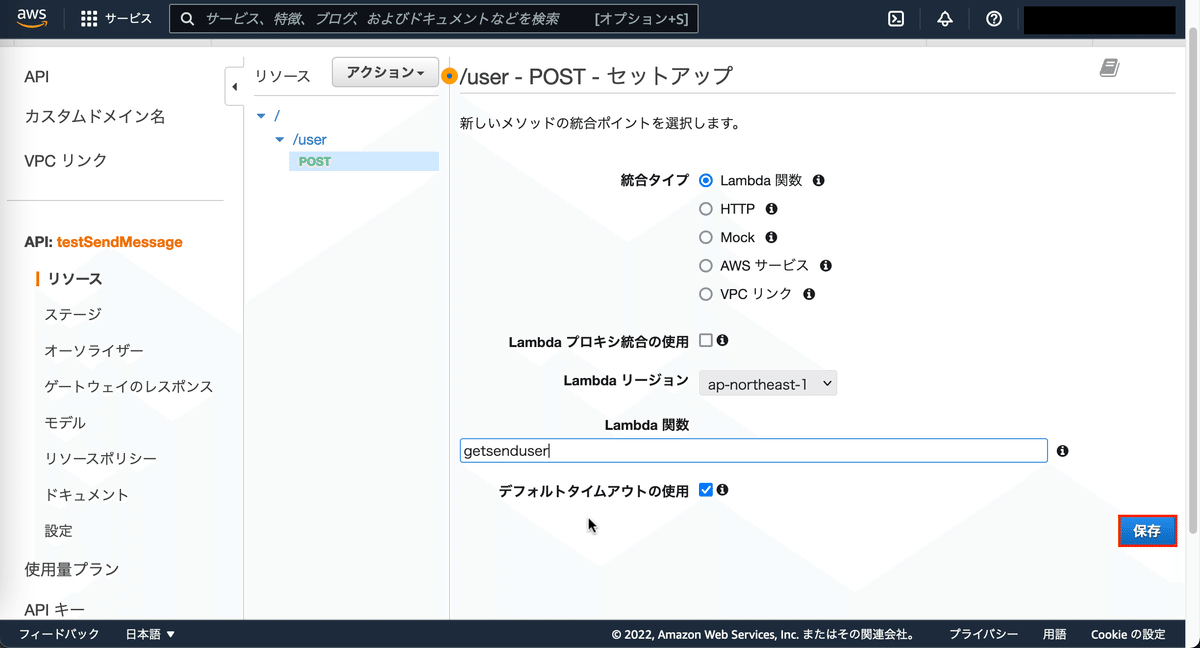
10、各項目を下記の画像の様に設定し、【関数の作成】を押下する。

11、検索欄に「IAM」と入力し、一覧から【IAM】を押下する。

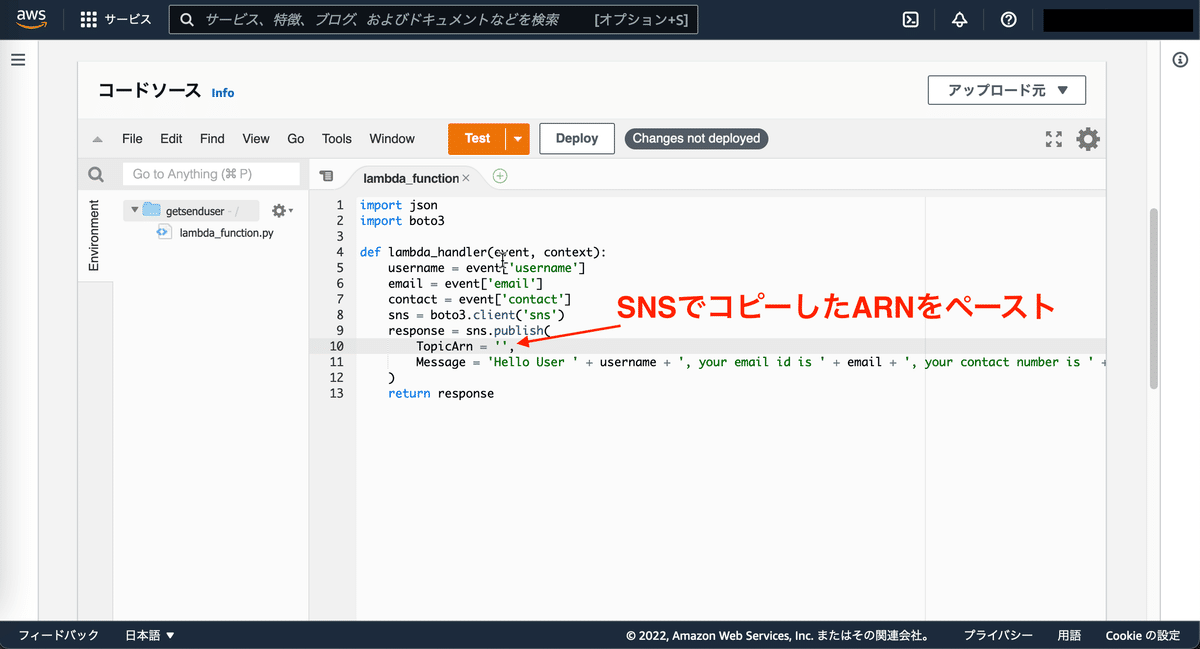
12、IAM画面の【アクセス管理】⇨【ロール】⇨【ロールを作成】の順に押下する。

13、【Lambda】⇨【次のステップ:アクセス権限】の順に押下する。

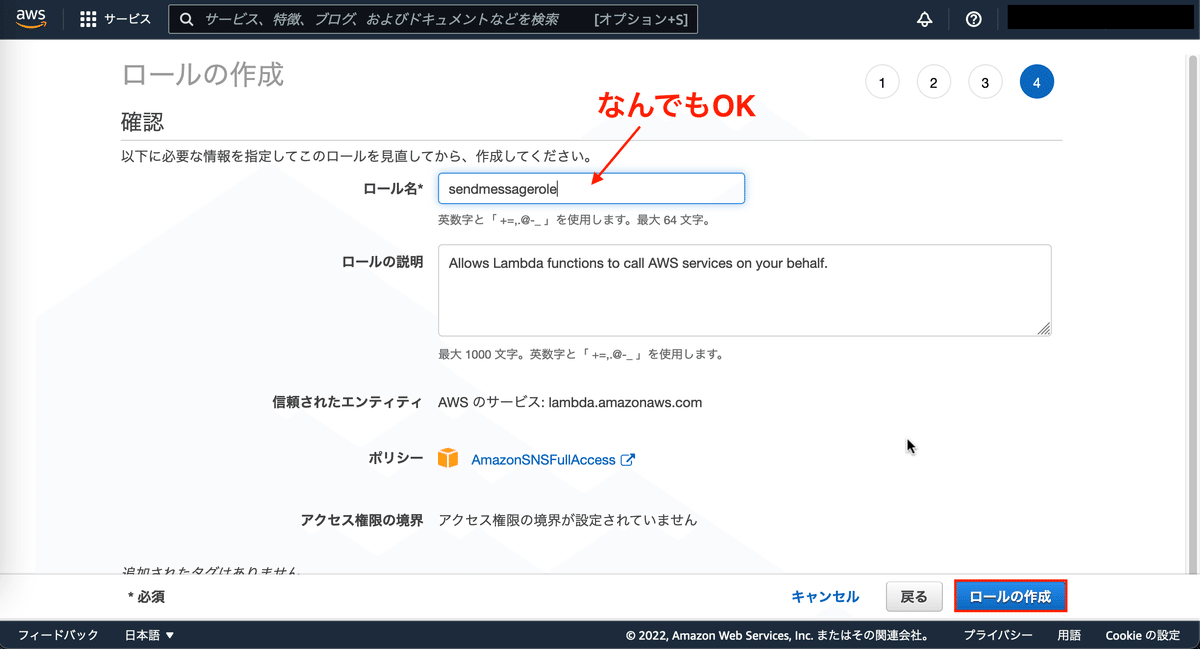
14、検索欄から「SNS」を入力し、【AmazonSNSFullAccess】を選択する。

15、【次のステップ:確認】を押下する。

16、ロール名を入力し、【ロールの作成】を押下する。
17、検索欄に「Lambda」と入力し、一覧から【Lambda】を押下する。

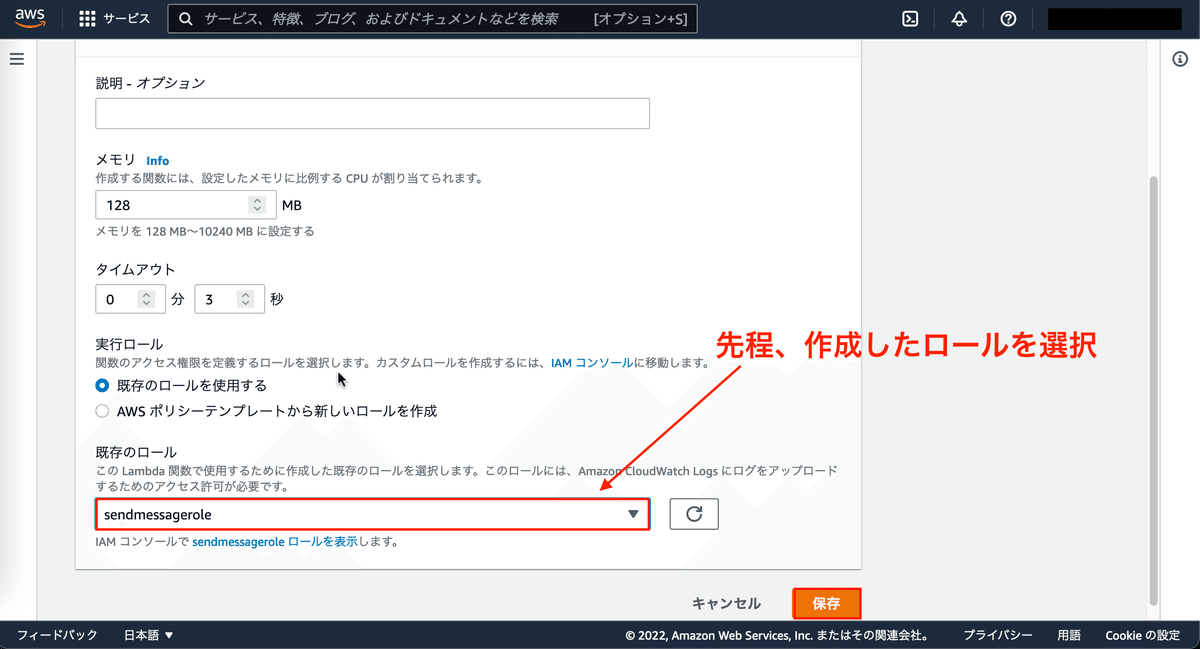
18、【設定】⇨【編集】の順に、編集画面に遷移する。

19、IAMで作成したロールを選択し、【保存】を押下する。
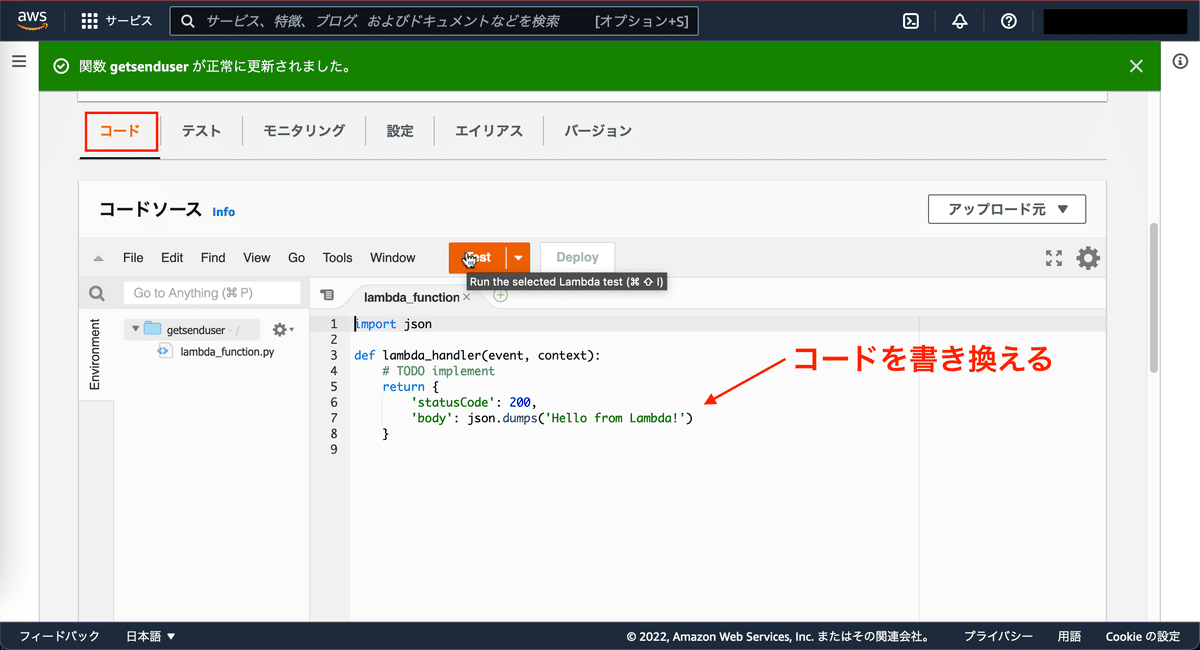
20、実行するコードを書き換えを行う。

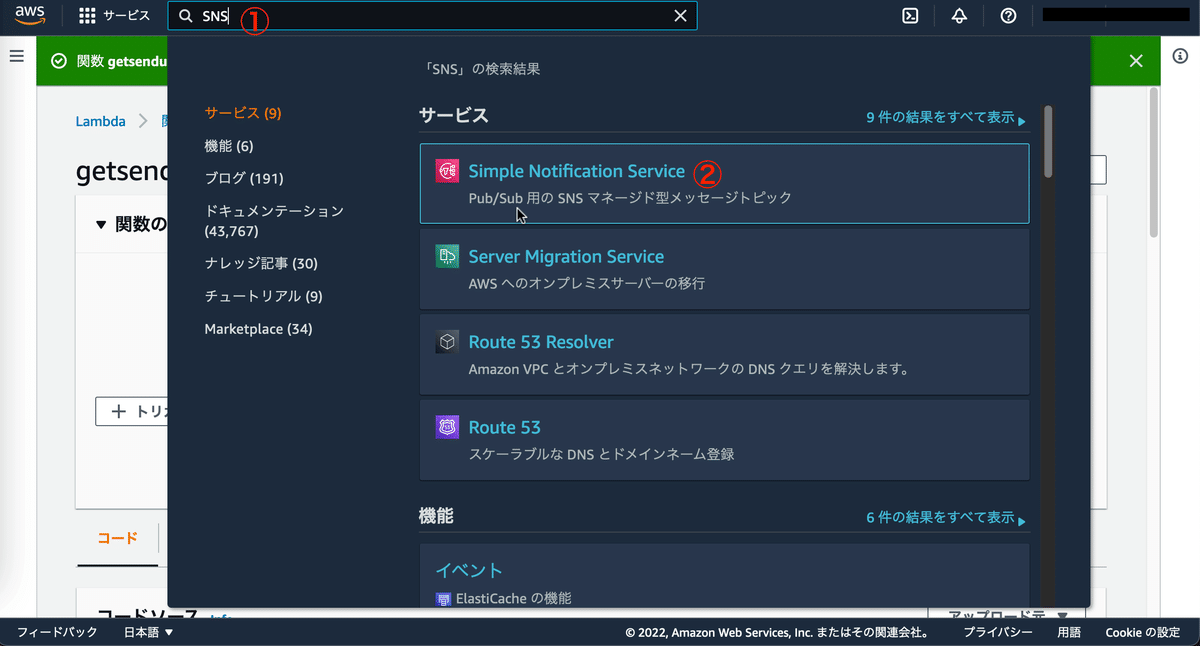
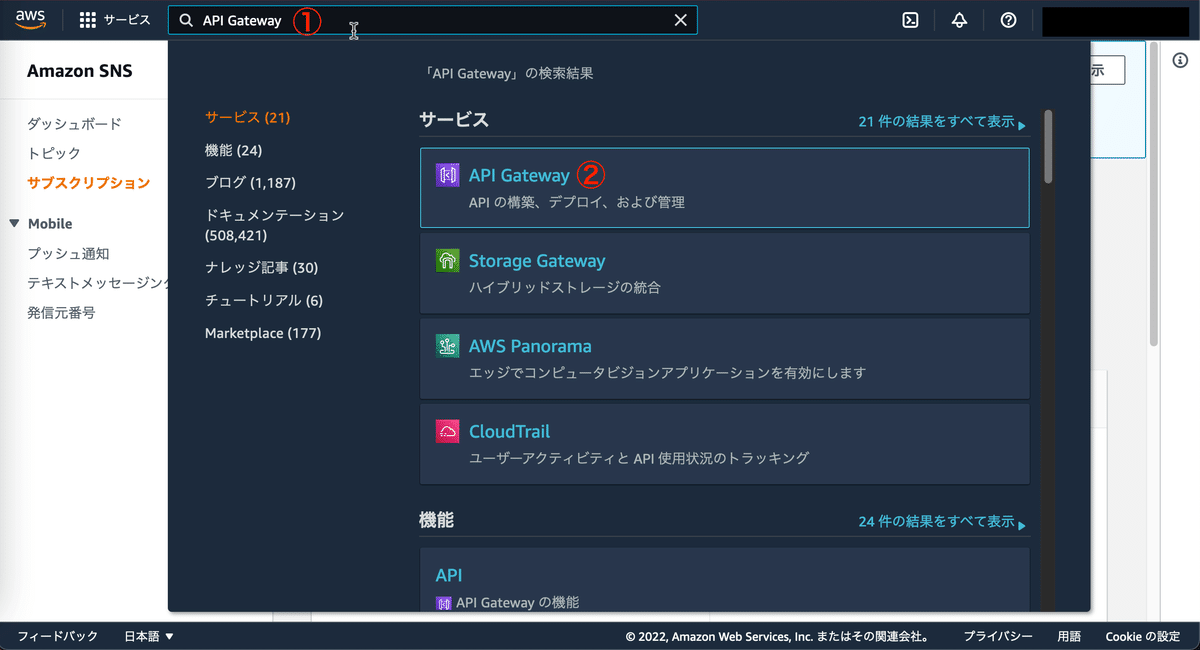
21、検索欄に「SNS」と入力し、一覧から【Simple Notification Service】を押下する。
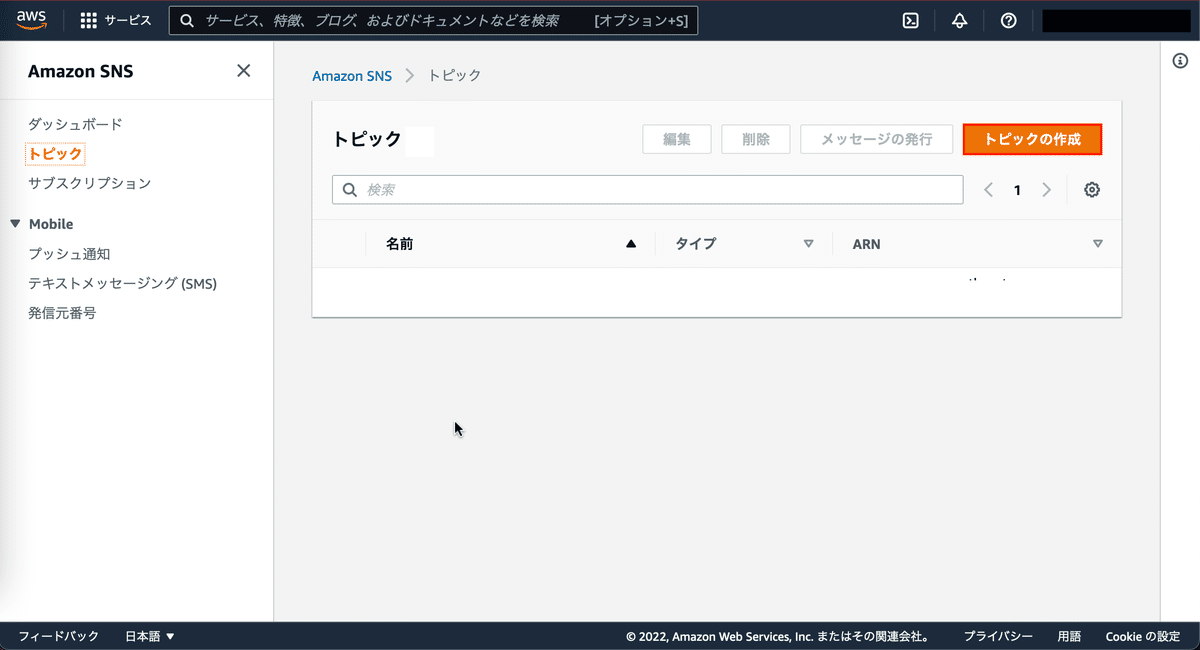
22、【トピックの作成】を押下し、トピック作成画面に遷移する。
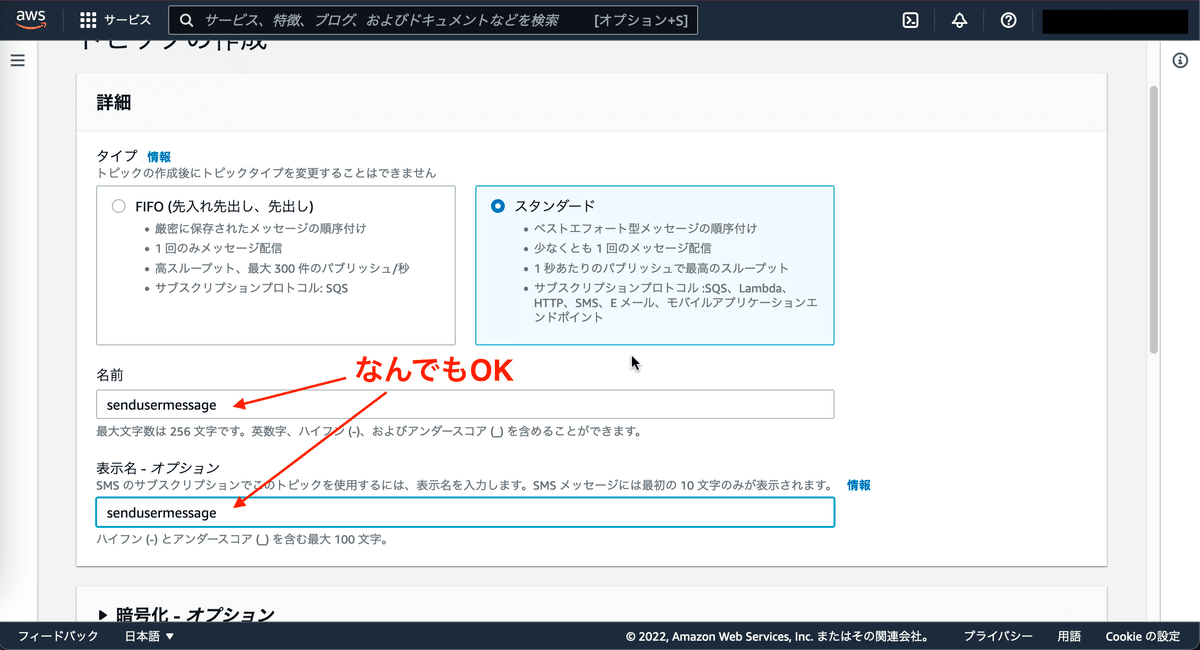
23、【タイプ】はスタンダードを選択を行い、【名前】、【表示名】を好きなものを入力し、トピックを作成する。
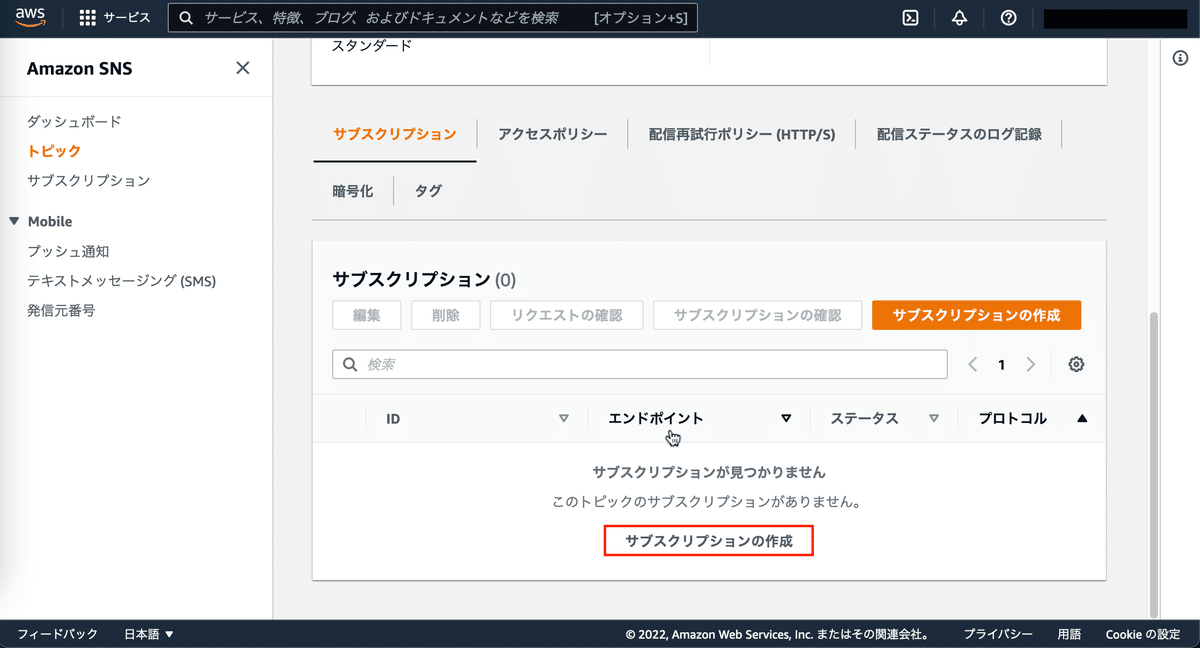
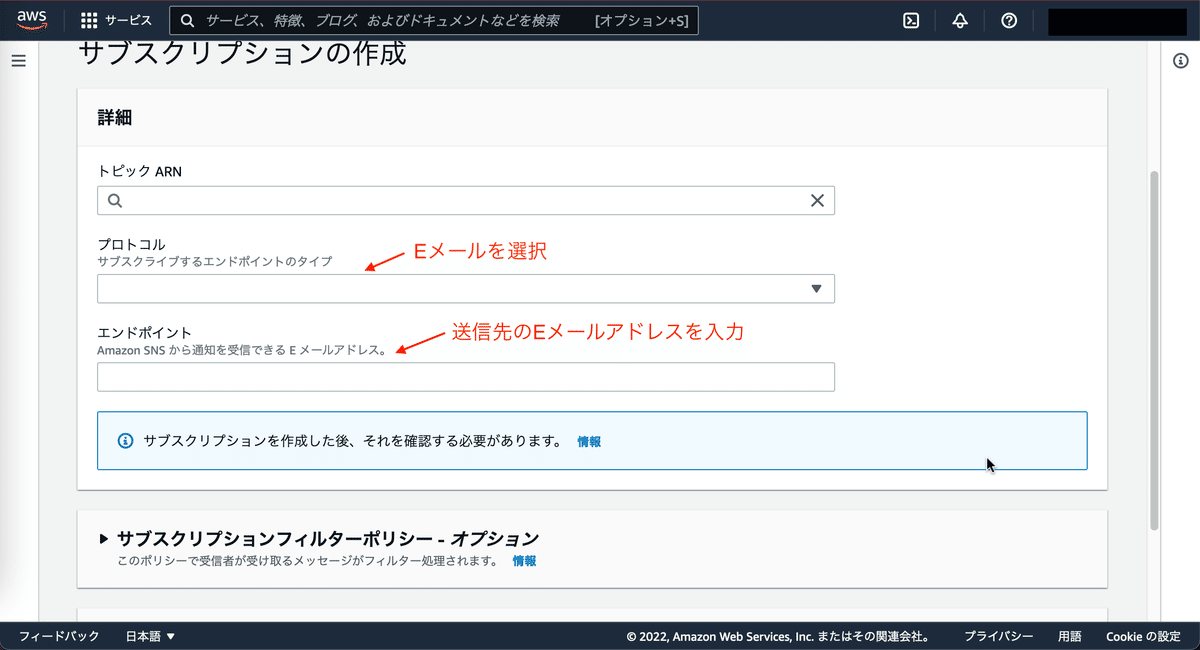
24、【サブスクリプションの作成】を押下し、サブスクリプション作成画面に遷移する。
25、【プロトコル】にはEメール選択を行い、【エンドポイント】には送信先メールアドレスを入力し、サブスクリプションを作成する。
26、サブスクリプション作成後、入力したメールアドレス宛にサブスクリプション認証許可通知が届くので、【Confirm subscription】を押下する。
押下後、認証が完了するためサブスクリプション詳細画面で【ステータス】が「確認済み」なっているか確認する。


27、検索欄に「API Gateway」と入力し、一覧から【API Gateway】を押下する。
28、【Lambda関数】に作成したLambda関数を選択し、【保存】を押下する。
29、検索欄に「SNS」と入力し、一覧から【Simple Notification Service】を押下する。

30、作成したトピックの詳細画面で表示されているARNをコピーする。

31、検索欄に「Lambda」と入力し、一覧から【Lambda】を押下する。
32、トピック詳細画面でコピーしたARNをペーストする。
33、検索欄に「API Gateway」と入力し、一覧から【API Gateway】を押下する。

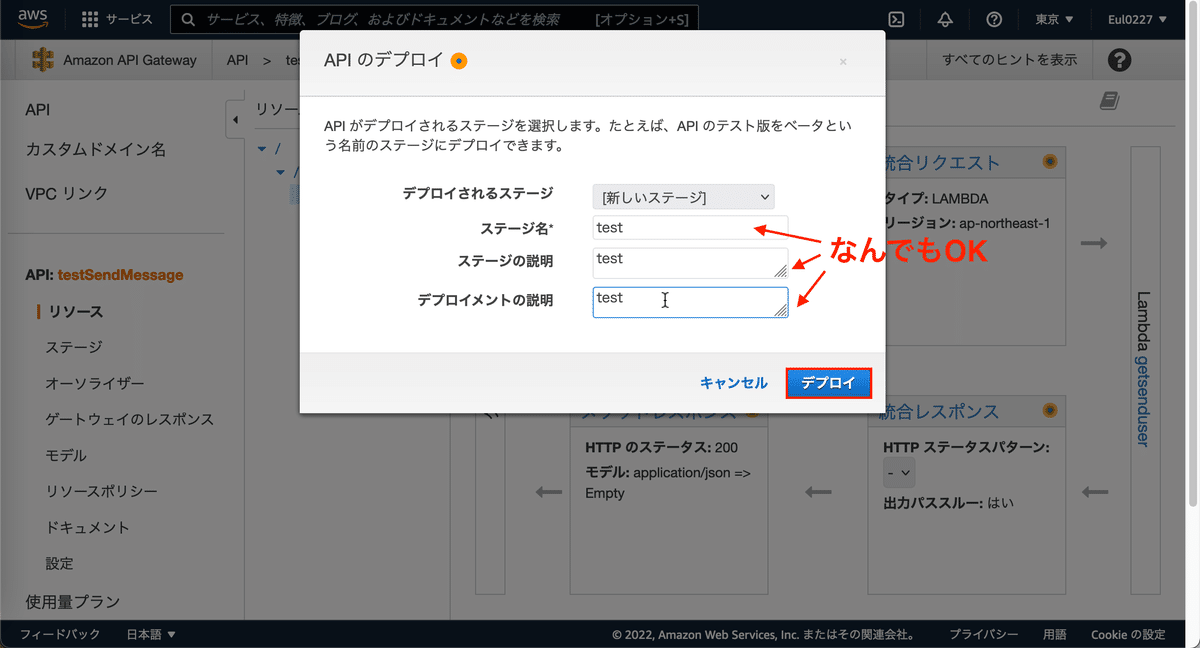
34、【アクション】⇨【APIのデプロイ】の順にデプロイ実行画面に遷移する。

35、下記の画像の様に設定を行い、【デプロイ】を押下する。
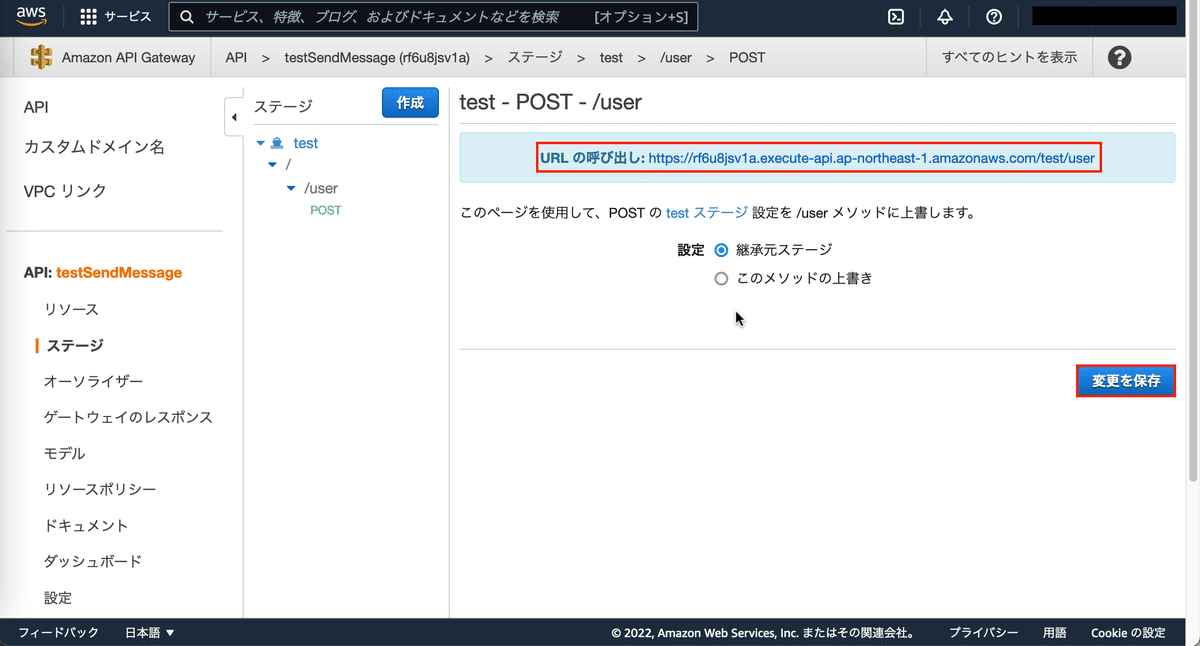
36、生成されたURLをコピーする。
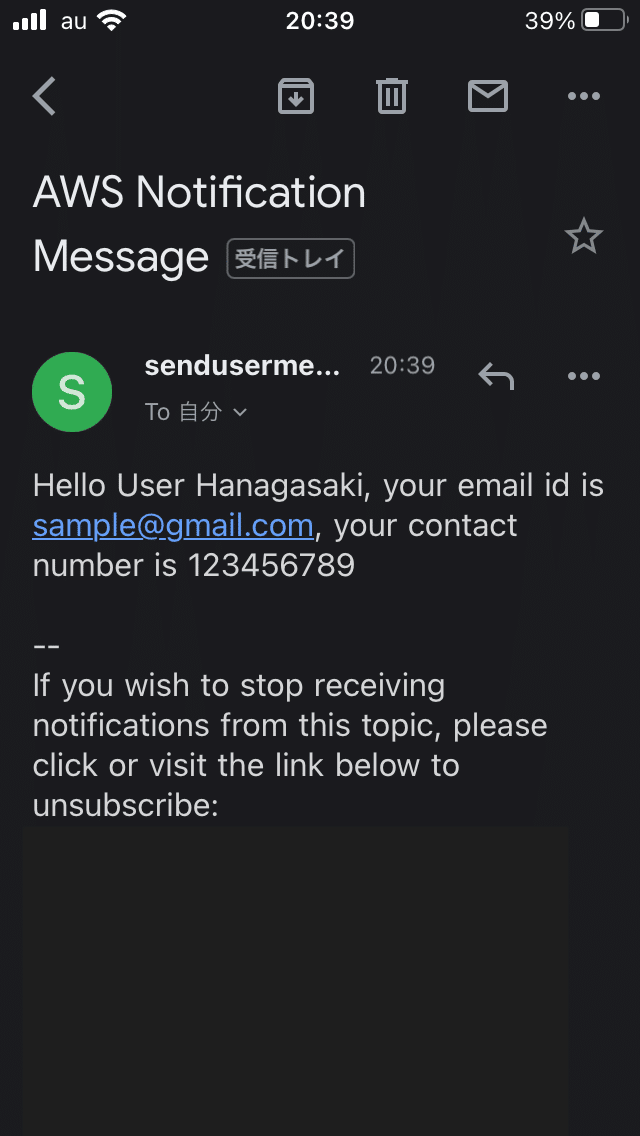
37、コピーしたURLをPostmanを使用して、APIを叩く。

38、指定したメールアドレスに通知が届く。
Xcode側
UI

コード
import UIKit

class ViewController: UIViewController {

    @IBOutlet weak var sendBtn: UIButton! {
        didSet {
            sendBtn.layer.borderColor = UIColor.blue.cgColor
            sendBtn.layer.borderWidth = 1
        }
    }

    override func viewDidLoad() {
        super.viewDidLoad()
    }

    @IBAction func sendMessageAction(_ sender: Any) {
        EmailMessageSendApi()
    }

    private func EmailMessageSendApi() {

        var params = Dictionary<String,String>()
        params["username"] = "Hanagasaki"
        params["email"] = "sample@gmail.com"
        params["contact"] = "123456789"

        let request = NSMutableURLRequest(url: NSURL(string: "https://rf6u8jsv1a.execute-api.ap-northeast-1.amazonaws.com/test/user")! as URL,
                                          cachePolicy: .useProtocolCachePolicy,
                                          timeoutInterval: 10.0)
        request.httpMethod = "POST"

        do {
            request.httpBody = try JSONSerialization.data(withJSONObject: params, options: [])
        } catch let error as NSError {
            print(error.localizedDescription)
        }

        let session = URLSession.shared
        let dataTask = session.dataTask(with: request as URLRequest, completionHandler: { (data, response, error) -> Void in
            do {
                let json = try JSONSerialization.jsonObject(with: data!, options: JSONSerialization.ReadingOptions.allowFragments)
                print(json)
            }
            catch let error as NSError {
                print(error.localizedDescription)
            }
        })
        dataTask.resume()
    }
}
送信結果

おわりに
API Gateway + Lambda + SNSでモバイル端末にEメール通知する機能について、紹介しました。
次はCognito(認証機能)について、学習しようと思います。