DELTA ANCHOR #2
Hi! How are you?
Today is a continuation of the last time ↓
Let’s get started🪛
皆さんこんにちは!今日は前回の続きから。
それでは始めます。
3. Main plate part 2
[Stud screws]


M2x12

Be careful as the nuts is easy to loosen. Lightly tighten the nut and tighten it about 1/4 turn from the position where it stopped.
このナットは緩みやすいので注意。軽く締め付けて止まった位置から更に1/4回転ほど締め込んでください。

Also, It may bend if it crashes. Needle nose pliers are a must have.
あとクラッシュするとよく曲がります。ラジオペンチは必需品です。
Points
If something goes wrong during use, this screws is the cause of bending (It does not return to the neutral position, the operation feeling is bad, the bumper angle adjustment does not work, etc). Please check the bumper from the side and check if there is any bending of the screws.
もし使用中に不調が出た場合はこちらのビスが曲がりが原因です (ニュートラル位置に戻らない、作動感が悪い、スラスト調整が効かなくなった等) 。バンパーを真横から見てビスの曲がりが無いかチェックしてください。

Finished ✔️
[Lantern poles]

Plastic specters

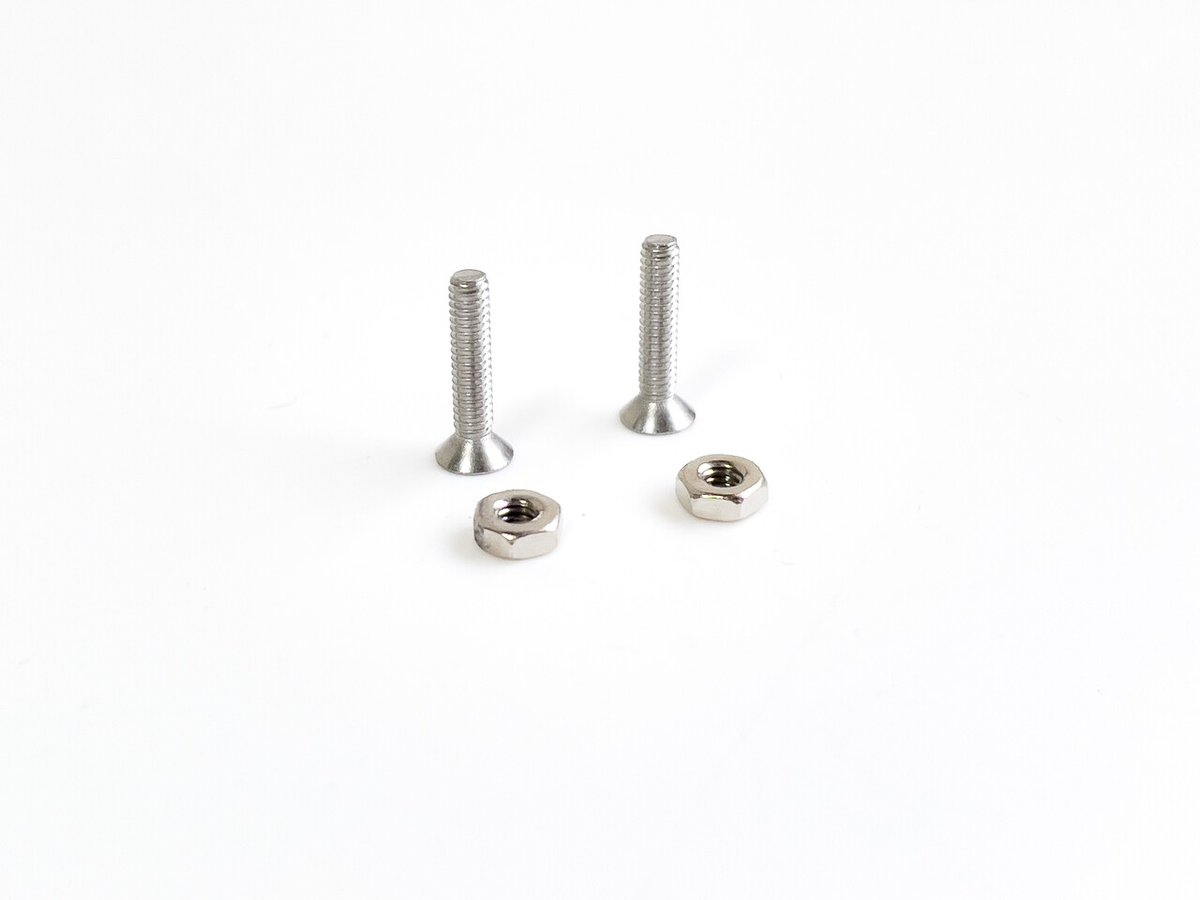
The Long screws, Plastic spacers, Spring washers, and Small nuts. Please choose the length of the countersunk screws and plastic spacers as you like.
長ビス、プラスチックスペーサー、スプリングワッシャーと小ナット。皿ビスやプラスペーサーの長さはお好みで選択してください。

Tighten the spring washer between the nut and the plastic spacer to prevent it from loosening. At this time, tighten the nut while lightly pushing the spacer in the direction of the arrow.
Be careful not to overtighten this nut as the plastic spacer will be distorted. Lightly tighten the nut and tighten it 1/8 turn from the position where it stopped.
This spacer is a consumable item, but it has a much longer life than an aluminum spacer. Please replace when it was worrisome.
緩み止めのためナットとプラスペーサーの間にスプリングワッシャーを挟んで締め付けますが、この時スペーサーを矢印方向に軽く押しながらナットを締め付けます。
このナットは締めすぎるとプラスチックスペーサーが歪むので注意。ナットを軽く締め、止まった位置から1/8回転締めます。
プラスペーサーは消耗品ですが、アルミスペーサーよりも断然ライフが長いです。気になった時に交換してください。
About the material of the spacers
The prototype used the aluminum spacers, but it seemed that the frictional resistance was unexpectedly large, and it often didn’t return to the neutral position.
Since the material of the plastic spacers is polyacetal resin, the coefficient of friction can be suppressed to about 1/3 compared to the aluminum spacers, and it can be easily returned to the neutral position.
スペーサーの材質について
試作機はアルミスペーサーを使用していましたが、意外と摩擦抵抗が大きく、デルタアンカーの場合はニュートラル位置に戻らないことがしばしばあって悩みの種でした。
プラスチックスペーサーの材質は何とスーパーマテリアルのポリアセタール樹脂なので、アルミスペーサーと比べて摩擦係数は約1/3程度に抑える事ができ、容易にニュートラル位置に戻ることができます。メーカーさんがPOM材質にした理由は私達エンドユーザーには分かりませんがgood jobです。めでたしめでたし。

Please create your favorite lantern and attach it to the long screw for use. The lantern O-ring lifter is glued to carbon.
お好きな提灯を作成して長ビスに取り付けて使用しましょう。提灯のOリングリフターはカーボンに接着するとお好みのテンションで位置決め出来るのでオススメ。
[Slide sheet]

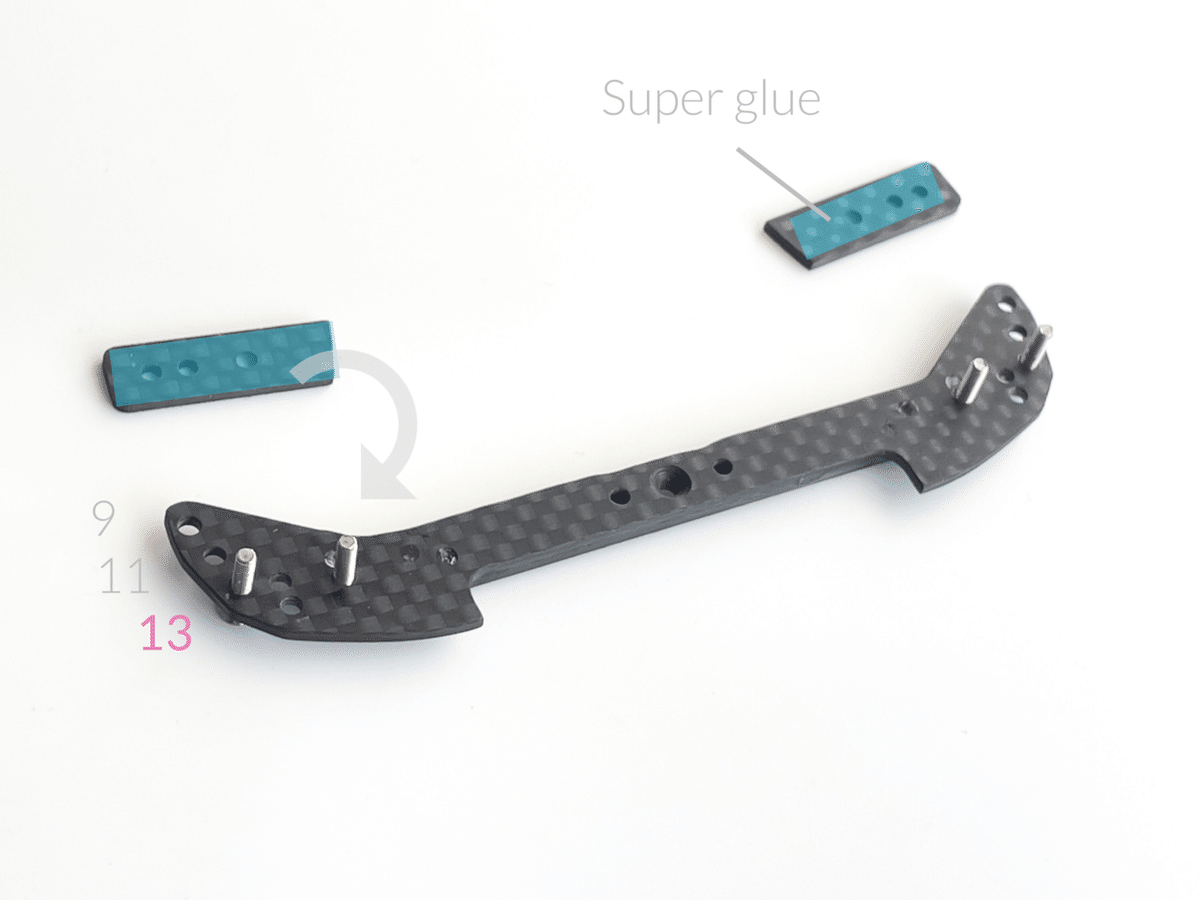
Make a slide sheet. Use the polycarbonate that comes with the gold plate terminal. The thickness is thin and just right. It can be polycarbonate from any chassis.
スライドシートを作ります。ゴールドターミナルに付属しているポリカを使用します。厚みが薄くて丁度いいです。車種は何でもOK。

Glue polycarbonate just behind the spacers
スペーサーのすぐ後ろにポリカを接着
Points
Positioning at the time of bonding is difficult. Uses slow-drying Super Glue to reduce adhesion errors. The point is to "glue directly behind the plastic spacers".
If there is an error in the bonding position, remove the polycarbonate with nippers, etc., water-grind the main plate with a grindstone or file to surface it, and then bond the new polycarbonate again to the flattened main plate.
接着時の位置決めが結構難しいので、遅乾性の3Gを使用すると失敗が少ないと思います。「支柱の真後ろに貼る」のがポイントです。
もし接着ミスの場合はニッパー等でポリカを剥がし、砥石や板ヤスリでメインプレートを水研ぎして面出しします。平らになったメインプレートに再度新しいポリカを接着してください。


Finished ✔️
4. Bumper part1
[Upper plate]


File the front and back with water.
Change to a matte surface.
両面を水研ぎ。マットな質感に。

Finished ✔️
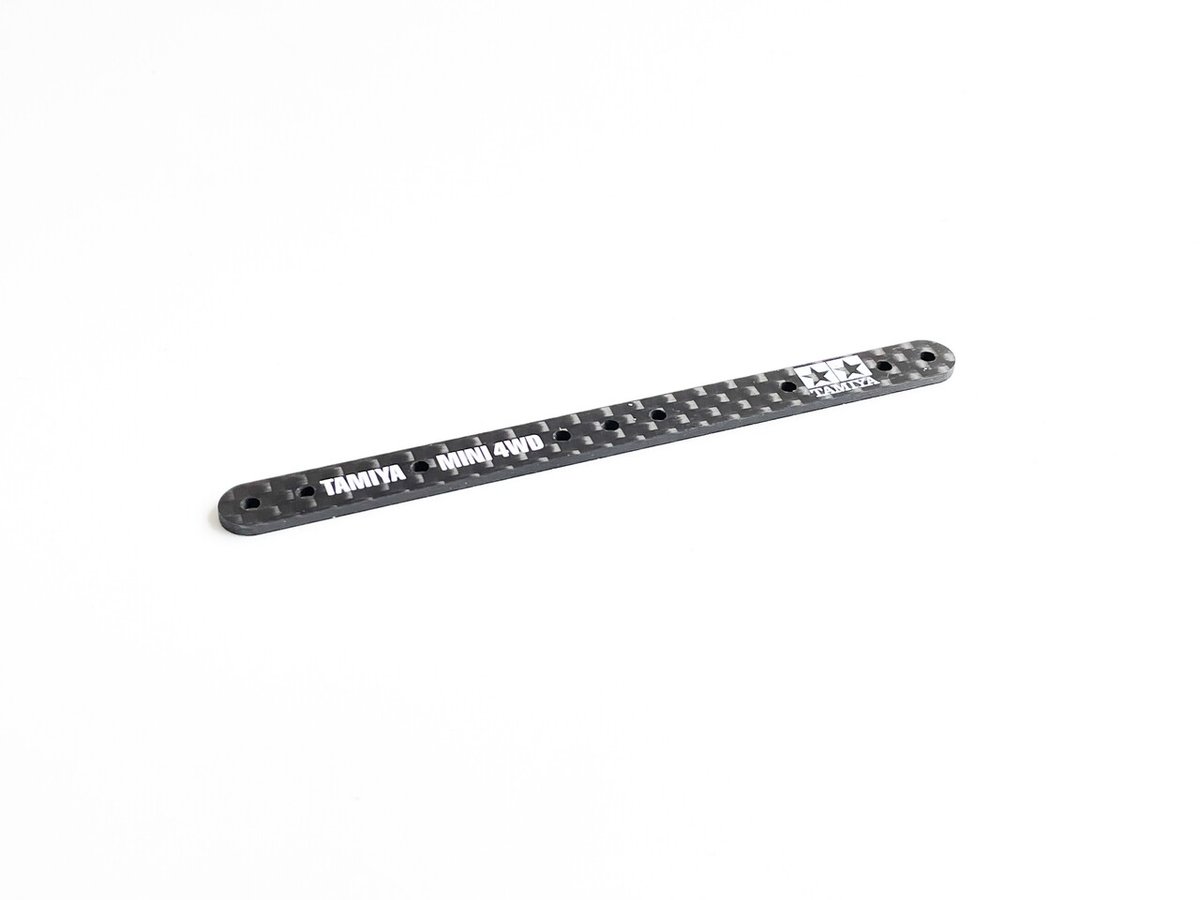
[BATMAN]

Japanese racers call it “BATMAN”

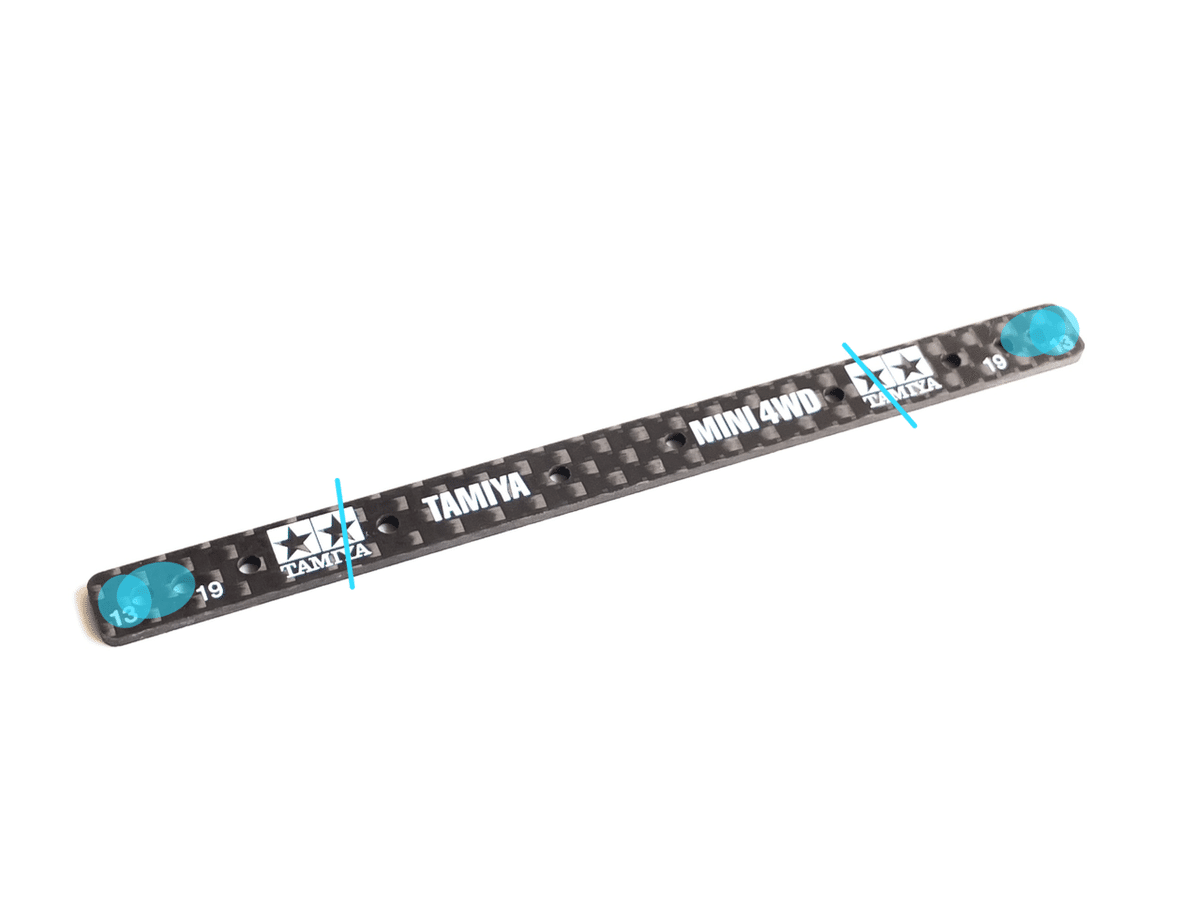
File up to the blue line.
Blue circle close the holes with super glue.
青線はヤスリ掛け。青丸は瞬着で塞ぎます。

Remove the protruding glue and flatten it.
File with water.
水研ぎ&面出し。はみ出た瞬着を除去。


Install the Dummy aluminum spacers as shown in the picture. Use as a cutting guide. Tighten the nut while gently pressing the spacer in the direction of the arrow.
写真の位置にダミースペーサーを取り付け、カッティングガイドとして使用します。スペーサーを矢印方向に軽く押しながらナットを締め付けます。

Apply the tape using the aluminum spacers as a guide. The tape looks distorted due to the distortion of the smartphone lens, but please put it straight.
ダミースペーサーをガイドにテープを貼ります。僕のスマホレンズの仕様でテープが歪んで見えますが真っ直ぐ貼ってくださいね笑。

Remove the dummy spacers and attach the screws at the position shown in the picture.
ダミースペーサーを取り外し、写真の位置にビスを取り付けます。


Changing this cut line will change the slide amount.
このカットラインを変更するとスライド量が変化

The cut line of the Delta anchor has the same shape as the Backslide anchor. If you have Backslide anchor, you can use it as a cutting jig.
カットラインはバクスラアンカーと同形状。もしバクスラをお持ちの方はカッティングジグとして使用できます。

Adjustment
Let's widen the width. Gradually widen the width so that the vertical movement moves smoothly. Finish with as few lateral gaps as possible. After scraping to some extent, chamfer the carbon edges. This will create a smooth finish with few gaps.
However, it is not good that you are too conscious of the gap and do not move smoothly up and down. In that case let's expand the width. Not too narrow, not too wide. Please try to find the best position.
上下動がスムーズに動くように横幅を少しずつ広げてゆきます。出来るだけ横方向の隙間が少ないように仕上げます。ある程度削ったらカーボンのエッジを面取りすると隙間が少なくスムーズに仕上がると思います。
ですが遊びが狭くても上下(片側だけ持ち上がる状態のナナメ)にサクサク動かないのは最も良くありません。その場合は少しずつ横幅を広げてみましょう。狭すぎず広すぎず。お気に入りを見つけてください。


Put guide screws in the center. Glue the Under plate and BATMAN. Use a slow curing type super glue.
中央にガイドビスを立ててアンダープレートとバットマンを3Gで接着します。

Lightly pressurize with pliers. It's lightly🤏
Extrude excess glue.
ペンチやプライヤーで軽く加圧。軽〜くです。
余分な接着剤を押し出します。

Leave it for about an hour.
約一時間くらいそのままにしておきましょう。

The hole in the middle may be blocked with glue.
真ん中は瞬着で塞がっている場合があるのでドリルでお掃除。

The front side
表側

The back side
裏側です。

The back side

Chamfer sharp edges
裏角メントリ

Finished ✔️
5. Make the Skid plates
[Standard type]

About the standard type Skid plates
Orthodox skid plates. Normal type that is not included in the rigid members. Even if it is glued, it will come off after 3 laps, so it is better not to glue it. 13mm roller holes type. If you loosen the screw and shift the hole position, you can use it for 9mm roller holes. The roller screw uses a cap screw with a low head, and is used by sandwiching Batman with a large washer. Protects Batman from cracks by sandwiching it with a large washer. Same type as “2step anchor” and “2step EVO”, with less trouble and reliable. recommendation!
標準タイプの引っ掛かり防止です。剛性メンバーに含まれないスタンダードタイプ。バンパーエンドは結構しなりますが、それもまた個性。強引な着地でも無理が効いたりします。もし接着しても3周位で剥がれるので接着はしない方がいいですね。13mmローラータイプですが、ナットを緩めて穴位置をずらせば8-9mmローラー穴にもギリギリ使えると思います。ローラービス位置を自由に変更できます。ローラービスは低頭加工したキャップスクリューを使用し、大ワッシャーでバットマンを挟んで使用します。大ワッシャーで挟むことでバットマンをクラックから守る設計。2step anchorなどで使用実績や信頼感があります。おすすめ!

If you have carbon scrap, it's okay.
適当な端材でもOK。


The photo shows the 25mm cap screws, but please use 30mm.
写真は25mmキャップスクリューですが30mmを加工・使用してください。


Secure skid plates with M2x8 and Large nuts.


Finished ✔️
[Press-fit type]

About the Press-fit type
For advanced users. Use by press-fitting a 30 mm cap screw. This is still being tested and there are no examples of its use. Durability is unknown. It is a reference exhibition.
If you use a cap screw with a countersunk screw for the roller screw, the roller will tilt back and forth and left and right without you knowing it, and it will be messed up. Based on that, I will press-fit the cap screw. The skid plate is glued and included in the rigid member, so the bumper rigidity is high. The position of the roller screw can’t be changed freely. When attaching and detaching the roller nuts, a hexagon wrench is no longer required, and maintainability is quite good. I'm still worried about what happens when the screw receives a big impact that bends.
postscript
It wasn’t good. It will bend if it crashes. I’ll post an example using a countersunk cap screw in Delta anchor Episode 3.
上級者向き。圧入タイプの引っ掛かり防止で、圧入タイプの30mmキャップスクリューを使います。これはまだテスト中で使用実例がありません。耐久性が不明です。参考出品です。
こちらはスキッドプレートをバットマンに接着し、剛性メンバーに含まれるのでバンパー剛性がとても高いです。ローラービス位置は自由に変更できませんが、ローラーナット脱着の時は六角レンチが不要になり、整備性はとても良いと思います。ビスが曲がる位の大きな衝撃を受けた時にどうなるのか不安が残ります。圧入キャップはテスト中です。結果が芳しくない場合は当該項目を削除する場合があります。ご了承ください。
追記
イマイチでした。大クラッシュすると曲がりますね。代わりに皿キャップスクリューを使った作例をデルタアンカーエピソード3に掲載するので許してね。


The back side. Adhere using the dummy screws as a guide.
裏側。ダミーネジをガイドにして3Gで接着します。


It’s easy to loosen, so please attach it with M2x8 and large nuts.
ロックナットで固定。

Expand 13mm roller holes to 2.5mm.
13mmローラー穴を2.5mmに拡大します。


Lathe work to a diameter of 2.65 to 2.70 mm.
直径2.65〜2.70mmに加工します。

ヤスリがあれば何でも出来る!
You can do it😁


糸メントリ

Make a slight notch with a round saw bit. This is anti-rotation.
丸ノコビットで少し切れ込みを入れます。回り止め。


Press fit into 2.5mm hole
2.5mm穴に打ち込みます
Points
The 2.5 mm hole edge can be press-fitted smoothly by chamfering the hole edge slightly with a countersunk screw bit or the like. Just a little🤏
After adhering the skid plates, attach the countersunk screws and then press fit.
2.5mm穴のホールエッジは皿ビスビット等でほんの少しだけ面取りすると打ち込み始めがスムーズです。ほんの少しですよ!
スキッドプレート接着後に皿ビスを取り付けてから圧入してください。

After press-fitting to some extent, try tightening a nut.
ある程度圧入したら叩きシロが無くなってくるので、こんな風にナットを締めて圧入してみましょう。

Finished ✔️
I don't use a hex wrench anymore, so stick polycarbonate on the screw head.
もう六角レンチは使わないので、ビス頭にポリカを貼ってしまいましょう。


It's a good idea to stick polycarbonate on the screw head with double-sided tape. Landing is very smooth.
こんな感じでビス頭付近に両面テープでポリカを貼るとGOOD。着地が綺麗です。
Be careful
It wasn’t good. It will bend if it crashes.
ご注意
圧入キャップはイマイチです。大クラッシュで曲がります笑
-.-.-.-.-.-.-.-.-.-.-.-.-.-.-.-.-.-.-.-.-.-.-.-.-.-.-.-.-.


It’s a DELTA2
Goodbye here today.
Please stay tuned for episode 3. ↓
See you!
今日はここまで。第3話につづきます…↓
ではまた!
