
Raspberry Pi 5にUbuntuをインストールしたときの設定メモ

「Raspberry Pi 5 /8GB」に「Raspberry Pi Imager」で「Ubuntu Desktop (64bit)」を書き込んだときのセットアップ手順の例をメモしておきます。
ソフトウェアの更新
Software Updater
「Software Updater」を実行してソフトウェアを更新します。
aptコマンド
aptコマンドも実行して、再起動します。
sudo apt update
sudo apt upgrade
sudo apt autoremove
sudo reboot
日本語化設定
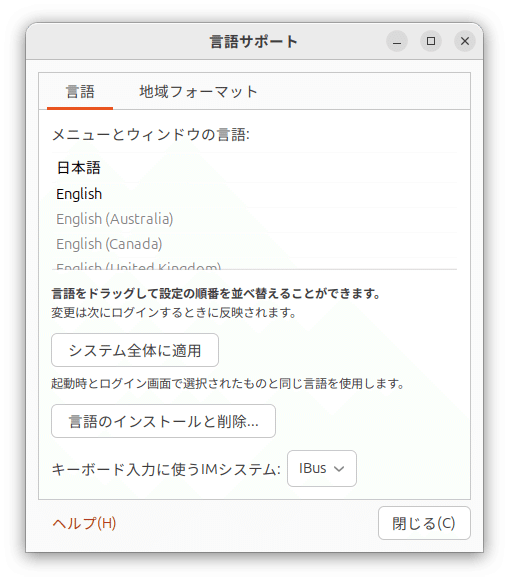
Ubuntuの設定
「Setting」→「System」→「Region & Language」を開いて日本語化設定を行います。

再起動するとシステム全体が(一部英語のままですが)日本語化されています。
sudo reboot設定後はこのようになっているかと思います。

「Manage Installed Languages」を開くとこんな感じになるように設定しておきます。

Flatpakの設定
App Centerの状態
Raspberry Pi 5にUbuntuを入れた場合、アプリ管理ツールの「App Center」が文字化けしているかと思います。

Flatpakのインストール
App Centerの文字化けの解決方法がわからないので、代わりに「Flatpak」をインストールしてこちらを使用することにします。
sudo apt install flatpakSoftware Flatpakプラグインをインストールします。
sudo apt install gnome-software-plugin-flatpakFlatpakアプリを入手するのに最適な、Flathubのリポジトリを追加します。
flatpak remote-add --if-not-exists flathub https://dl.flathub.org/repo/flathub.flatpakrepo設定を完了するため、再起動します。
sudo rebootFlatpakでインストールできるアプリ
リモートデスクトップの設定
ifconfigのインストール
sudo apt install net-tools
ifconfig
リモートデスクトップの設定
「設定」→「システム」→「Remote Desktop」を開きます。
「Desktop Sharing」タブの、「Desktop Sharing」と「Remote Control」をOnにして、パスワードを覚えやすいものに変更しておきます。
(今回の例ではRaspberry Pi 5のホスト名には、「pi-ubuntu」が設定されています。)

「リモートログイン」タブの、「リモートログイン」をOnにしておきます。

SSHの設定
openssh-serverの設定
Ubuntuに「openssh-server」をインストールします。
sudo apt install openssh-serverSSHのステータスを確認します。
sudo systemctl status sshサービスがactiveになっていればここで終了ですが、それ以外の場合は以下のコマンドを実行して、サービスを実行します。
sudo systemctl enable ssh
sudo systemctl start ssh
Ubuntuの設定
「設定」→「システム」→「Secure Shell」を開き、「Secure Shell」をOnにします。

sshで接続する
クライアント側から以下のコマンドでSSH接続して、CUIベースでRaspberry Pi 5を操作します。
ここで、userは設定したユーザー名、hostは設定したホスト名に置き換えて実行します。
ssh user@host