ラズパイ上のWebサーバをHTTPSサーバーにする
やること概要
●前回(→リンク)作ったWEBサーバを通信が暗号化されるHTTPSサーバにする。
ー 通信の暗号化に必要な証明書を用意する。
ー 証明書は、オレオレ証明書(自己証明書)にする。
環境
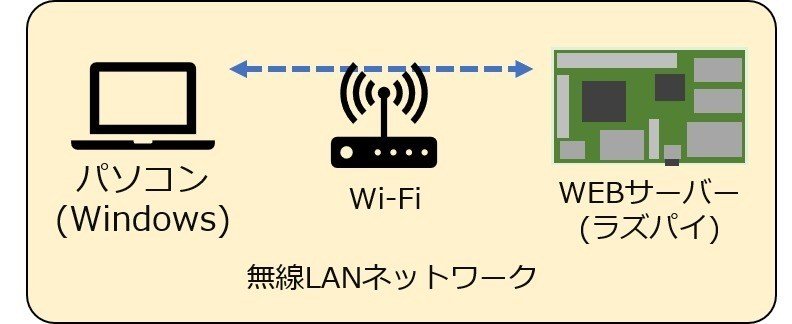
環境は前回と同じです。WEBサーバになっているラズパイをHTTPSサーバーにして、パソコンからhttps://・・・ でアクセスできるようにします。

作っていきます。
/data/nodejs/03-https というディレクトリを作って初期化を行います。
newpi@raspi-hoge:~/data/nodejs $ mkdir 03-https
newpi@raspi-hoge:~/data/nodejs $ cd 03-https/
newpi@raspi-hoge:~/data/nodejs/03-https $ npm init
newpi@raspi-hoge:~/data/nodejs/03-https $ npm install express --save
※参考※
『npm install express --save』で失敗する場合→トラブルシュート (*1)
npm init を実行すると、いくつか質問が来ます。こんな感じで答えました。
newpi@raspi-hoge:~/data/nodejs/03-https $ npm init
(node:678) [DEP0022] DeprecationWarning: os.tmpDir() is deprecated. Use os.tmpdir() instead.
This utility will walk you through creating a package.json file.
It only covers the most common items, and tries to guess sane defaults.

See `npm help json` for definitive documentation on these fields
and exactly what they do.

Use `npm install <pkg> --save` afterwards to install a package and
save it as a dependency in the package.json file.

Press ^C at any time to quit.
name: (03-https) https  ※ https としました。
version: (0.0.0)      ※ 無回答
description:         ※ 無回答
entry point: (index.js)  ※ 無回答 -> index.js となります。
test command:        ※ 無回答
git repository:       ※ 無回答
keywords:           ※ 無回答
author:            ※ 無回答
license: (ISC)
About to write to /home/newpi/data/nodejs/03-https/package.json:

{
  "name": "https",
  "version": "0.0.0",
  "description": "",
  "main": "index.js",
  "scripts": {
    "test": "echo \"Error: no test specified\" && exit 1"
  },
  "author": "",
  "license": "ISC"
}

Is this ok? (yes)
オレオレ証明書を作ります。
$ openssl genrsa 2048 > server.key
$ openssl req -new -key server.key > server.csr
$ openssl x509 -days 3650 -req -signkey server.key < server.csr > server.crt
『openssl genrsa 2048 > server.key』実行時にパスワード設定があります。今回は password というパスワードを設定しました。
newpi@raspi-hoge:~/data/nodejs $ openssl genrsa -aes128 1024 > server.key
Generating RSA private key, 1024 bit long modulus
.....++++++
.....................++++++
e is 65537 (0x010001)
Enter pass phrase:  ※ password と設定
Verifying - Enter pass phrase:  ※ もう一度 password と設定
『openssl req -new -key server.key > server.csr』実行時に、最初にパスワード入力があります。先ほど設定したパスワード (password) を入力します。
newpi@raspi-hoge:~/data/nodejs $ openssl req -new -key server.key > server.csr
Enter pass phrase for server.key: ※ 先ほど設定したパスワード(password)を入力します
You are about to be asked to enter information that will be incorporated
into your certificate request.
What you are about to enter is what is called a Distinguished Name or a DN.
There are quite a few fields but you can leave some blank
For some fields there will be a default value,
If you enter '.', the field will be left blank.
-----
Country Name (2 letter code) [AU]:JP
State or Province Name (full name) [Some-State]:Tokyo
Locality Name (eg, city) []:Setagaya
Organization Name (eg, company) [Internet Widgits Pty Ltd]:raspi-https
Organizational Unit Name (eg, section) []:test-https
Common Name (e.g. server FQDN or YOUR name) []:raspi-hoge
Email Address []:

Please enter the following 'extra' attributes
to be sent with your certificate request
A challenge password []:
An optional company name []:
『openssl x509 -in server.csr -days 90 -req -signkey server.key > server.crt』実行時にも、先ほど設定したパスワード(password)を設定します。
$ openssl x509 -in server.csr -days 90 -req -signkey server.key > server.crt
Signature ok
subject=C = JP, ST = Tokyo, L = Setagaya, O = raspi-https, OU = test-https, CN = raspi-hoge
Getting Private key
Enter pass phrase for server.key: ※ 設定したパスワード(password)を入力
index.js ファイルをディレクトリ 03-https/ の下に作成します。
index.js の内容は以下です。
"use strict";

// express を使う
var express = require("express");
var app = express();
app.use(express.static("wwwroot"));
app.get("/", function(req, res) {
  res.sendFile("wwwroot/index.html");
});

// http サーバ
var http = require("http").Server(app);
http.listen(3000);

// https サーバ
var fs = require("fs");
var opt = {
  key:  fs.readFileSync("server.key"),
  cert: fs.readFileSync("server.crt"),
  passphrase: "password", // オレオレ証明書でのパスワードを書く
};
var https = require("https").Server(opt, app);  // https サーバを立てる
https.listen(3001);
index.html ファイルを 03-https/wwwroot/ の下に作成します。
index.html の内容は以下です。
<html>
    <head>

    </head>
    <body>
       テストです。
    </body>
</html>
構築が完了しました。ディレクトリ構成は↓のようになります。


動かしてみる
HTTPSサーバーを起動します。
node index.js実際の実行画面はこんな感じです。エラーが発生せず、実行中になれば成功です。

アクセスしてみます。
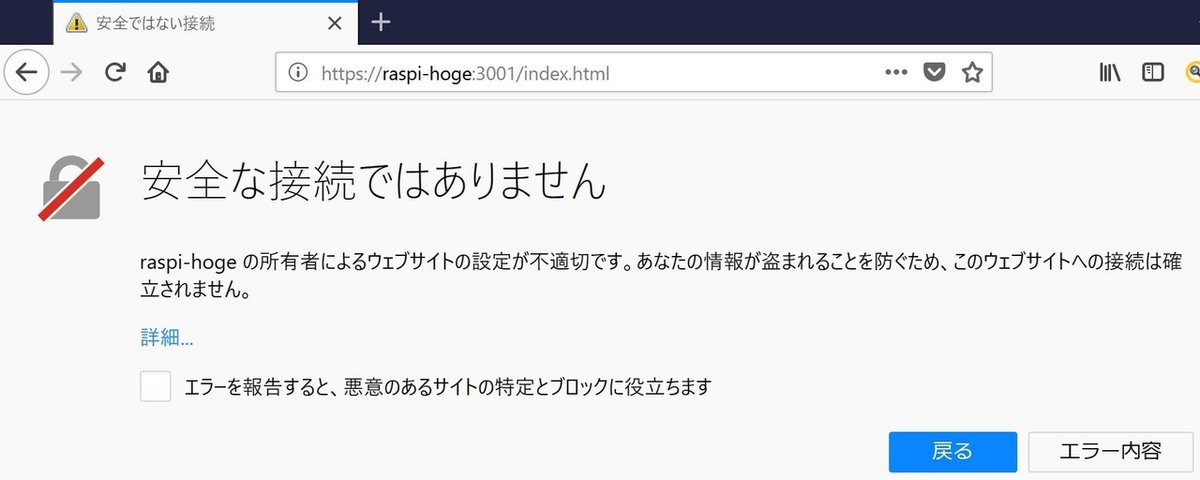
Widowsパソコンでブラウザ(Firefox)を開いて以下のURLにアクセスします。
https://{ラズパイのホスト名 or IPアドレス}:3001/index.html
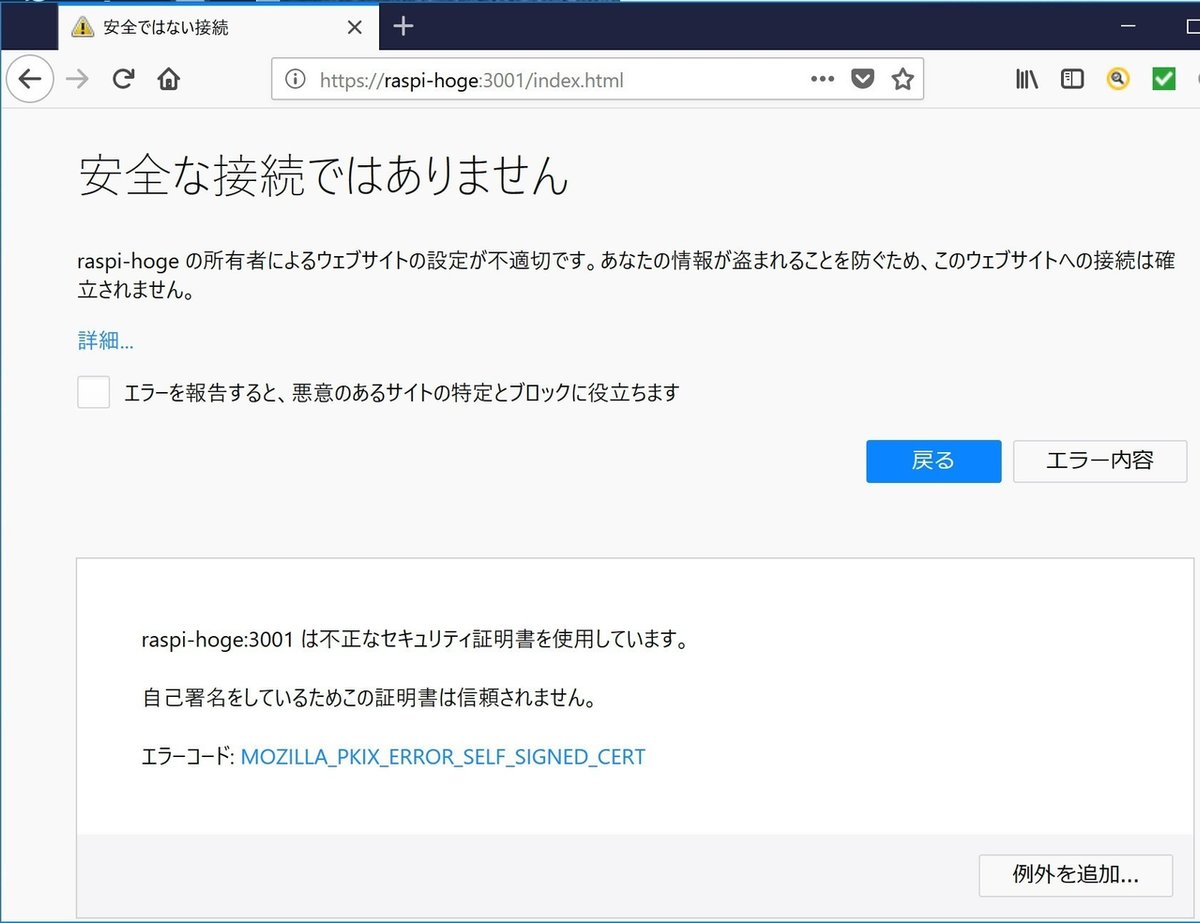
オレオレ証明書を使っているので、ブラウザが安全でないと警告を出します。表示するために、ブラウザに安全ですよという設定をします。
「エラー内容」ボタンをクリックします。

「例外を追加」ボタンをクリックします。

「セキュリティ例外を承認」ボタンをクリックします。

無事に開きました。

トラブルシュート
(*1) 『npm install express --save』実行でエラーが発生
$ npm install express --save
npm notice created a lockfile as package-lock.json. You should commit this file.
npm WARN nodejs-3@1.0.0 No description
npm WARN nodejs-3@1.0.0 No repository field.

+ express@4.16.3
added 50 packages from 47 contributors and audited 119 packages in 9.783s
found 0 vulnerabilities

   ╭───────────────────────────────────────────────────────────────╮
   │                                                               │
   │       New minor version of npm available! 6.1.0 → 6.3.0       │
   │   Changelog: https://github.com/npm/npm/releases/tag/v6.3.0   │
   │               Run npm install -g npm to update!               │
   │                                                               │
   ╰───────────────────────────────────────────────────────────────╯
<考えらえる対策>
バージョンを上げろと言ってるようなのでバージョンを上げてみます。
$ sudo npm install -g npm
/usr/local/bin/npm -> /usr/local/lib/node_modules/npm/bin/npm-cli.js
/usr/local/bin/npx -> /usr/local/lib/node_modules/npm/bin/npx-cli.js
+ npm@6.3.0
added 16 packages from 13 contributors, removed 34 packages and updated 31 packages in 29.279s
おわりに
前回作ったWEBサーバを、オレオレ証明書を使ってHTTPSサーバにしました。HTTPS通信が必須のWEBアプリのテストなどに使えると思います。
いいなと思ったら応援しよう!

