goaでバスの路線図APIを作る(ビュー編)
ビュー実装
前回のAPIから取得できるデータを使ったビューを作る。
ビューは地図上に路線図を書くので、leafletを使う。
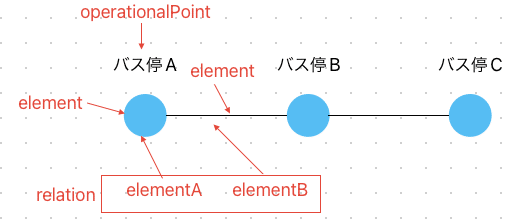
APIから取れるデータはこんな感じになっていて、

図にするとこんな感じ。

elementをrelationのA→Bの順に繋いでいくと路線経路が引ける様になっている。
このデータをLeaflet用のデータに変換するところを書いて
// Geojson型へキャスト
function getCoordinate(c){
    return [c.latitude,c.longitude]
}
// 経路を生成
function getCoordinates(cs){
    var coordinates = []
    for(let c of cs){
        coordinates.push(getCoordinate(c))
    }
    if(coordinates.length==1){
        coordinates.push(coordinates[0])
    }
    return coordinates
}
// elementをleafletのFeatureへキャスト
function getFeature(element){
    return {
        "type": "Feature",
        "geometry": {
            "type": "LineString",
            "coordinates": getCoordinates(element.coordinates)
        }
    }
}
// elementsをleafletのFeatureCollectionへキャスト
function GetFeatures(elements){
    var features = []
    for(let e of elements){
        features.push(getFeature(e))
    }
    return {
        "type": "FeatureCollection",
        "features": features
    }
}
// operationalPointの位置を取得
function GetBusstops(elements, ops){
    var busstops = []
    for(let op of ops){
        for(let e of elements){
            if(op.elementID == e.id){
                coordinate = getCoordinate(e.coordinates[0])
                busstops.push({
                    "coordinate": [coordinate[1],coordinate[0]],
                    "name": op.name
                })
            }
        }
    }
    return busstops
}
このデータをleafletに渡す。
// 線(FeatureCollection)オブジェクト生成
var line = GetFeatures(res.elements)
// 線を描画
L.geoJSON(line,{
    onEachFeature: function onEachFeature(
         feature,
         layer
  ){
      if(feature.properties && feature.properties.popupContent){
        layer.bindPopup(feature.properties.popupContent);
     }
     }
}).addTo(map)
// バス停情報の配列生成
var busstops = GetBusstops(res.elements,res.operationalPoints)
// バス停の表示
var popup = L.popup();
for(let busstop of busstops){
     L.marker(busstop.coordinate).addTo(map).on("click",function(e){
        popup.setLatLng(e.latlng).setContent(busstop.name).openOn(map);
     })
}
ここまでで、地図上に線とバス停が描ける。

これに加えて、relationでelementを辿って経路を矢印で描く処理を作る。
// 矢印を引く
for(let r of res.relations){
     var elementA=[], elementB=[]
   var arrow = false
   for(let e of res.elements){
      // 矢印の起点
      if(r.elementA == e.id){
          if(e.coordinates.length>1){
              elementA = getCoordinate(e.coordinates[e.coordinates.length-2])
          }else if(e.coordinates.length==1){
              elementA = getCoordinate(e.coordinates[0])
          }else{
              console.error("coordinate not found")
          }
      }
      // 矢印の終点
      if(r.elementB == e.id){
              if(e.coordinates.length>1){
              elementB = getCoordinate(e.coordinates[1])
          }else if(e.coordinates.length==1){
              elementB = getCoordinate(e.coordinates[0])
              arrow = true
          }else{
              console.error("coordinate not found")
          }
      }
   }
  // polylineDecoratorへ矢印を引く座標を渡す
   if(arrow) {
       var polyline = L.polyline([[elementA[1],elementA[0]],[elementB[1],elementB[0]]]).addTo(map);
       var decorator = L.polylineDecorator(polyline, {
            patterns: [
                 {offset: '100%', repeat: 0, symbol: L.Symbol.arrowHead({pixelSize: 5, polygon: true, pathOptions: {stroke: true}})}
            ]
       }).addTo(map);
   }
}
矢印を引くのは下記を使った。
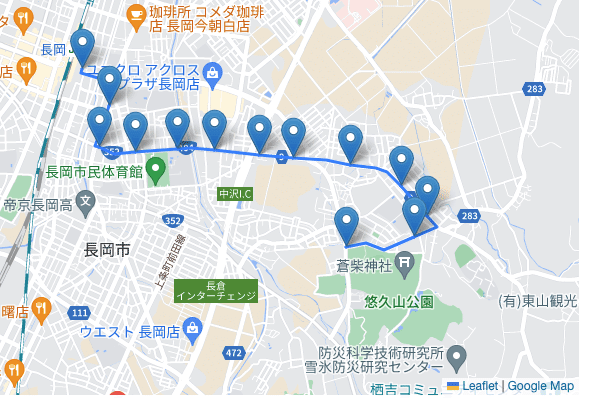
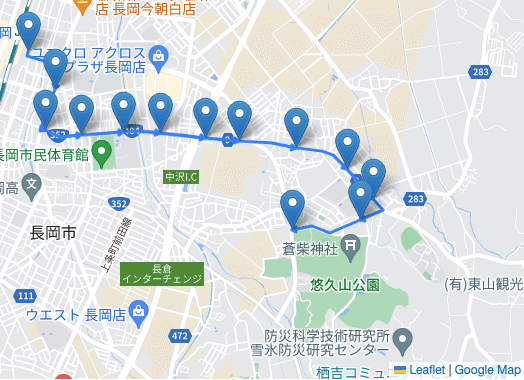
経路を引いたのがこちら。

というわけで、goaでAPI作り終わりました。
感想
というわけで、goaでAPI作り終わりました。
goaはわからないことを調べるのが少し大変だけど、慣れればすごく良さそう。
何よりAPIとして動くモックがすぐにできて、designが変わってもある程度は自動生成の範囲でカバーできるので、開発効率上がりそうだなと。
以上、読んでくださりありがとうございました。
今回作ったコードは下記に置いておきます。
