
[ソースコード有]2要素認証Gmailの突破方法

Googleが提供する Gmail API を使うと、自分のGmailアカウントから安全にメールを取得することができます。この方法はセキュリティとプライバシーを確保しながらも、メール内容を自動的に処理するのに便利です。この記事では、Gmail APIの設定方法とPythonを使ったコード例を紹介します。
例えば、物を購入する工程を自動化する際にgmail側にパスコードが送られたりすると思いますが、そういった2要素認証を突破する際に使用できます。
またGmailの内容を他アプリに通知したいなどにも使えますのでよければご参考にしてください。
画像を多く入れておりますので初心者でもわかるかと思います。
準備:Gmail APIを使うための設定
1Google Cloud Consoleでプロジェクトを作成
Google Cloud Console にアクセスし、新規プロジェクトを作成します。
https://console.cloud.google.com/
※Gmailを取得したいアカウントで上記URLをクリックしてください


project name/location はなんでもよいです

2 Gmail APIを有効化
作成したプロジェクトの「APIとサービス」から「ライブラリ」を選択し、「Gmail API」を検索して有効にします。


3 OAuth 2.0 クライアントIDを作成
「認証情報」から「+ 認証情報を作成」ボタンを押し、「OAuth クライアントID」を選択します。


違いとしては以下になります。ここではexternalを選択。
Internal: 組織内のみ利用、承認不要。
External: 組織外も対象、テスト段階でのユーザー制限、必要に応じてGoogleの承認が必要。
詳細は以下になります。


App name はなんでもよいです。
User support email はよく使うemailアドレスを指定すればよいです。
とりあえずここでは、gmailを使っております。
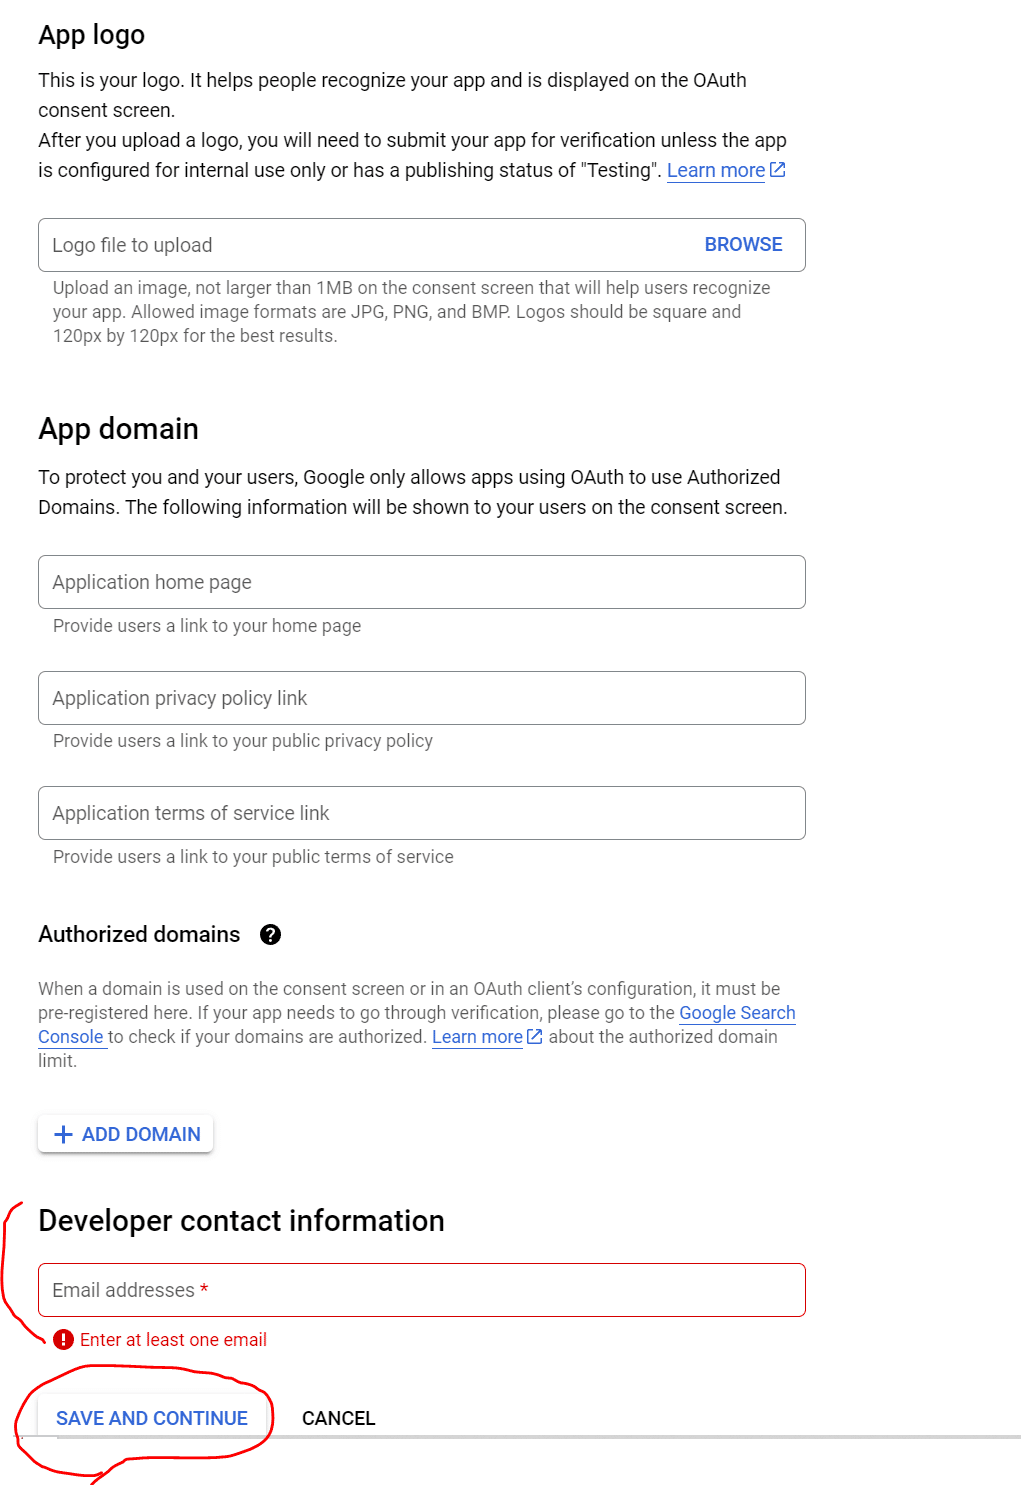
同様にdeveloper contact information 用のEmail addresses を記載して
SAVE AND CONTINUEを押してください


その後SAVE AND CONTINUE をクリック

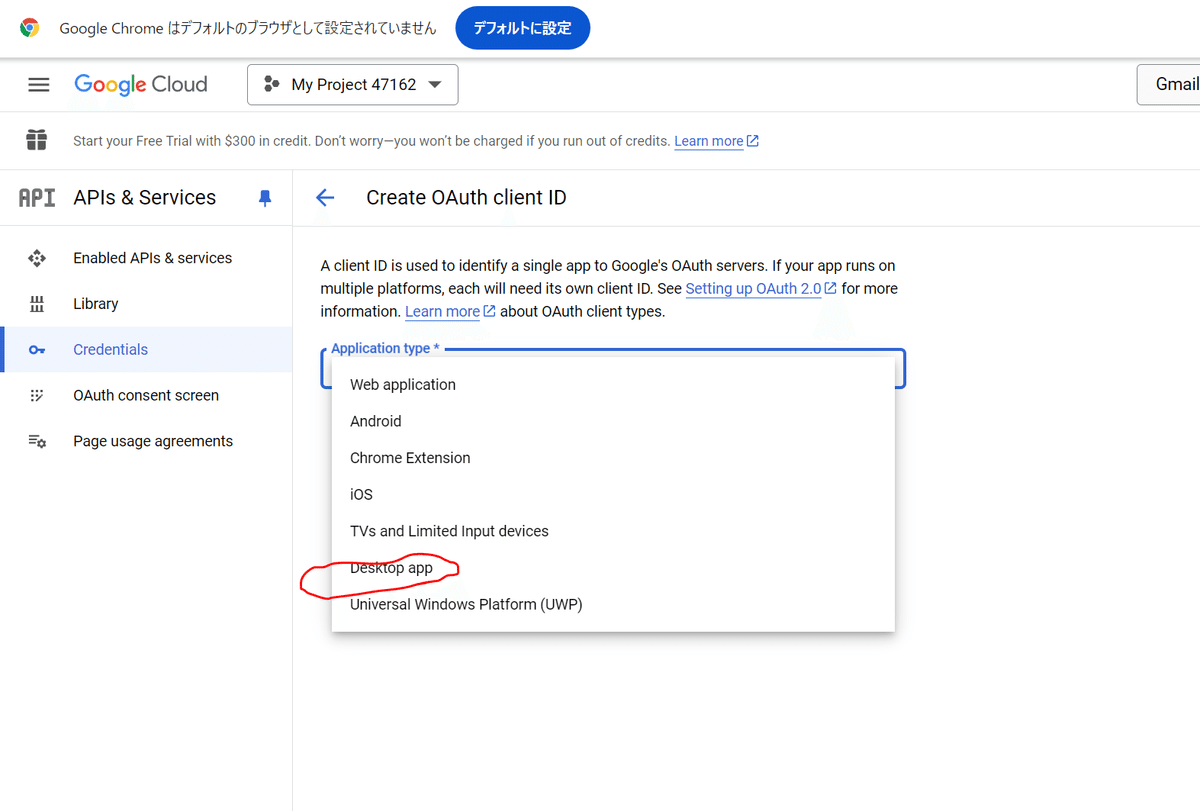
4 アプリケーションの種類に「デスクトップアプリ」を選択し、必要な情報を入力して「作成」します。

Credentials-CREATE CREDENTIALS -OAuth client ID を順にクリックする。

Name はなんでもよいです。
5 クレデンシャルファイルをダウンロード
作成したクライアントIDの「ダウンロード」ボタンをクリックし、credentials.jsonという名前で保存します。このファイルをプログラムと同じフォルダに配置します。

上述のとおりダウンロードしたファイルのjsonファイルの名前を
credentials.json としておいてください。
ここまででAPIのクライアントシークレットキーが取得できました。
ここからこのキーを使ってpythonコードでGMAILを取得していきます。
6 サンプルコードの実行
サンプルコード:Gmail APIを使ってメールを取得
以下のコードは、Gmail APIを使って自分のメールを取得し、メールの件名と本文の一部を表示するPythonのサンプルです。
import os
import base64
from google.oauth2.credentials import Credentials
from google_auth_oauthlib.flow import InstalledAppFlow
from googleapiclient.discovery import build

# Gmail API scope (read-only access)
SCOPES = ['https://www.googleapis.com/auth/gmail.readonly']

def gmail_authenticate():
    """Authenticates with Gmail API and retrieves credentials.

    Returns:
        Credentials object for authorized access.
    """

    creds = None
    if os.path.exists('token.json'):
        # Load credentials from existing token file
        creds = Credentials.from_authorized_user_file('token.json', SCOPES)
    else:
        # Initiate authorization flow if token file doesn't exist
        flow = InstalledAppFlow.from_client_secrets_file('credentials.json', SCOPES)
        creds = flow.run_local_server(port=0)
        # Save credentials for future use
        with open('token.json', 'w') as token:
            token.write(creds.to_json())

    return creds

def get_messages(service, user_id='me'):
    """Retrieves and prints a summary of messages from the specified user's inbox.

    Args:
        service: Gmail API service object.
        user_id (str, optional): User's email address (defaults to 'me').
    """

    results = service.users().messages().list(userId=user_id).execute()
    messages = results.get('messages', [])
    for msg in messages:
        # Get message details and subject
        txt = service.users().messages().get(userId=user_id, id=msg['id']).execute()
        payload = txt['payload']
        headers = payload['headers']
        for d in headers:
            if d['name'] == 'Subject':
                subject = d['value']
                print(f"Subject: {subject}")

        # Check for plain text parts and print the first 100 characters
        if 'parts' in payload:
            parts = payload['parts']
            for part in parts:
                if part['mimeType'] == 'text/plain':
                    data = part['body']['data']
                    text = base64.urlsafe_b64decode(data).decode("utf-8")
                    print(f"Message: {text[:100]}")
                    print("="*50)  # Print a separator between messages

def main():
    """Main function to perform authentication and message retrieval."""

    creds = gmail_authenticate()
    service = build('gmail', 'v1', credentials=creds)
    get_messages(service)

if __name__ == '__main__':
    main()
コードの説明
gmail_authenticate関数
credentials.json を使って認証を行い、token.json に認証情報を保存します。このファイルがあると、再度の認証を省略できます。
get_messages関数
メールのリストを取得し、各メールの件名(Subject)と本文の一部を表示します。本文はtext/plainの内容を取得し、デコードして表示しています。
main関数
認証とGmail APIサービスの作成を行い、メールを取得する関数を呼び出します。
初回実行時は以下のようなアカウントの選択画面が出ると思います。

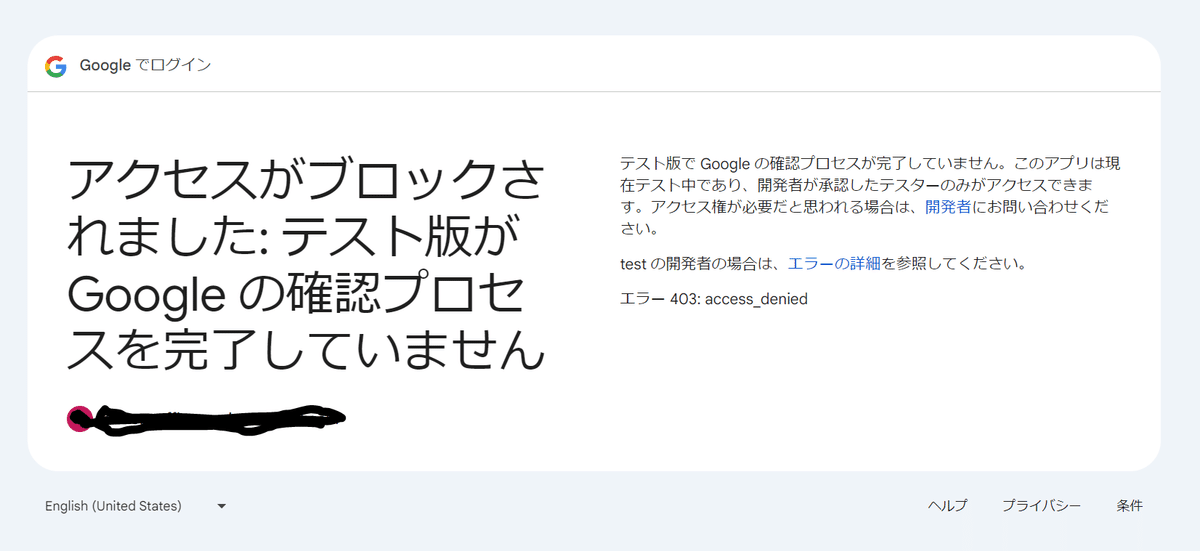
適切なアカウントではない場合以下のようなエラーとなります。
ここでいう適切とはADD USERS で追加したアカウントを指します。
良い場合は以下のような画面になります。

続行をクリックしてください。

これでpythonコードのターミナル画面でメールが取得できていると思います。
2回目以降はtoken.jsonファイルをもとにアクセスします。
一定期間アクセスがない場合はjsonファイルの作り直しになります。
参考になった方はいいねいただけると嬉しいです。