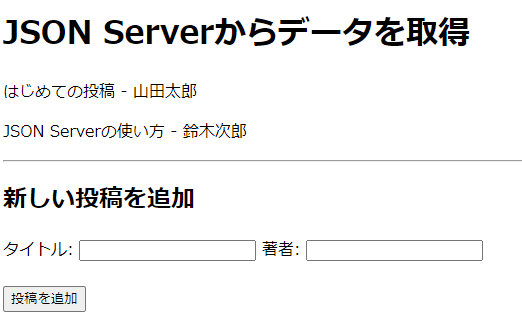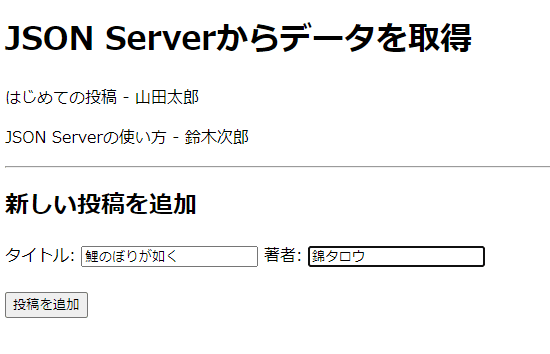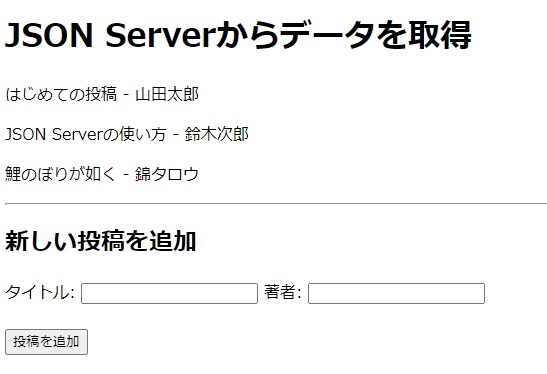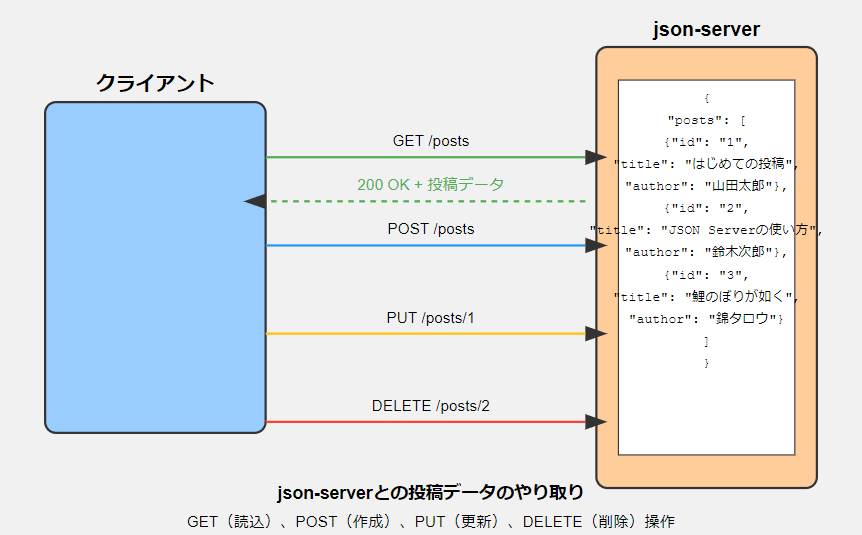
#048 フロントサイド(12):JavaScript入門9(JSON Server)
JSON Serverとは?
JSON Serverは、簡単にモックAPI(擬似的なAPI)を作成できるツールです。フロントエンド開発者がバックエンドの実装を待たずに、すぐにAPIとやり取りするための環境を整えることができます。
手順
1. Node.jsとnpmのインストール
まず、Node.jsとnpm(Node Package Manager)がインストールされていることを確認してください。インストールされていない場合は、Node.js公式サイトからインストールしてください。
2. JSON Serverのインストール
ターミナル(コマンドプロンプト)を開き、以下のコマンドを実行してJSON Serverをインストールします。
npm install -g json-server
3. JSONデータの準備
プロジェクトフォルダを作成し、その中にdb.jsonという名前のファイルを作成します。このファイルには、APIのデータとなるJSONを記述します。以下はサンプルデータです。
{
  "posts": [
    {
      "id": "1",
      "title": "はじめての投稿",
      "author": "山田太郎"
    },
    {
      "id": "2",
      "title": "JSON Serverの使い方",
      "author": "鈴木次郎"
    }
  ]
}
4. JSON Serverの起動
以下のコマンドを実行して、JSON Serverを起動します。プロジェクトフォルダ内で実行することを確認してください。
json-server --watch db.json --port 3000
5. index.htmlの作成
<!DOCTYPE html>
<html lang="ja">
<head>
    <meta charset="UTF-8">
    <meta name="viewport" content="width=device-width, initial-scale=1.0">
    <title>JSON Serverサンプル</title>
</head>
<body>
    <h1>JSON Serverからデータを取得</h1>
    <div id="postsOutput"></div> <!-- postsデータを表示するためのdiv -->
    <hr>
    <h2>新しい投稿を追加</h2>
    <form id="postForm">
        <label for="title">タイトル:</label>
        <input type="text" id="title" name="title" required>
        <label for="author">著者:</label>
        <input type="text" id="author" name="author" required>
        <br><br>
        <button type="submit">投稿を追加</button>
    </form>

    <script>
        // JSON Serverからpostsデータを取得する関数
        async function fetchPosts() {
            try {
                // 'http://localhost:3000/posts'からデータを取得
                const response = await fetch('http://localhost:3000/posts');
                // 取得したデータをJSON形式に変換
                const data = await response.json();
                // データを表示するためのdiv要素を取得
                const postsOutput = document.getElementById('postsOutput');
                // データをHTMLに変換して、div要素の中に表示
                postsOutput.innerHTML = data.map(post => `<p>${post.title} - ${post.author}</p>`).join('');
            } catch (error) {
                // エラーが発生した場合はコンソールにエラーメッセージを表示
                console.error('データの取得に失敗しました:', error);
            }
        }

        // 新しい投稿を追加する関数
        async function addPost(event) {
            event.preventDefault(); // フォームのデフォルトの送信動作を防ぐ
            const title = document.getElementById('title').value;
            const author = document.getElementById('author').value;

            try {
                // 現在のpostsデータを取得
                const response = await fetch('http://localhost:3000/posts');
                const data = await response.json();

                // 現在の最大IDを取得し、新しいIDを設定
                const maxId = data.reduce((max, post) => Math.max(max, parseInt(post.id)), 0);
                const newId = maxId + 1;

                // 新しい投稿を追加
                const postResponse = await fetch('http://localhost:3000/posts', {
                    method: 'POST',
                    headers: {
                        'Content-Type': 'application/json'
                    },
                    body: JSON.stringify({ id: newId.toString(), title, author })
                });
                if (postResponse.ok) {
                    // 投稿が正常に追加された場合、投稿一覧を再度取得
                    fetchPosts();
                    // フォームをリセット
                    document.getElementById('postForm').reset();
                } else {
                    console.error('投稿の追加に失敗しました');
                }
            } catch (error) {
                console.error('投稿の追加中にエラーが発生しました:', error);
            }
        }

        // ページが読み込まれたらpostsデータを取得
        fetchPosts();

        // フォーム送信時に新しい投稿を追加
        document.getElementById('postForm').addEventListener('submit', addPost);
    </script>
</body>
</html>
基本的な概念
1. asyncとawait
async関数は、非同期処理を扱うための関数です。awaitキーワードを使うことで、非同期処理が完了するまで待つことができます。これにより、非同期処理を簡単に扱えるようになります。
async: このキーワードを関数の前に付けると、その関数は非同期関数になります。
await: このキーワードを使うと、Promiseが解決されるまで関数の実行を一時停止します。
Promiseとは?
Promise(プロミス)は、JavaScriptで非同期処理を扱うためのオブジェクトです。非同期処理の結果を表し、最終的に成功(fulfilled)または失敗(rejected)したかを示します。
簡単な説明
非同期処理: データの取得やファイルの読み込みなど、時間がかかる処理をバックグラウンドで実行します。処理が完了する前に次のコードを実行します。
Promise: 非同期処理が完了した後に何をするかを定義するためのものです。
Promiseの状態
Pending(保留中): 初期状態。非同期処理がまだ完了していない。
Fulfilled(成功): 非同期処理が成功し、結果が返された状態。
Rejected(失敗): 非同期処理が失敗し、エラーが返された状態。
2. fetch
fetchは、サーバーとHTTPリクエストを行うためのモダンな方法です。データを取得するために使われます。Promiseを返すので、awaitと一緒に使われることが多いです。
データを取得する関数
async function fetchPosts() {
    try {
        // 'http://localhost:3000/posts'からデータを取得
        const response = await fetch('http://localhost:3000/posts');
        // 取得したデータをJSON形式に変換
        const data = await response.json();
        // データを表示するためのdiv要素を取得
        const postsOutput = document.getElementById('postsOutput');
        // データをHTMLに変換して、div要素の中に表示
        postsOutput.innerHTML = data.map(post => `<p>${post.title} - ${post.author}</p>`).join('');
    } catch (error) {
        // エラーが発生した場合はコンソールにエラーメッセージを表示
        console.error('データの取得に失敗しました:', error);
    }
}
async function fetchPosts(): 非同期関数を定義します。asyncを使うことで、この関数内でawaitを使うことができます。
const response = await fetch('http://localhost:3000/posts');: fetchを使って、指定したURLからデータを取得します。awaitを使うことで、データが取得されるまで次の行の実行を待ちます。
const data = await response.json();: 取得したデータをJSON形式に変換します。これも非同期処理なのでawaitを使います。
postsOutput.innerHTML = data.map(post => <p>${post.title} - ${post.author}</p>).join('');: 取得したデータをHTML形式に変換して、ページに表示します。
新しい投稿を追加する関数
async function addPost(event) {
    event.preventDefault(); // フォームのデフォルトの送信動作を防ぐ
    const title = document.getElementById('title').value;
    const author = document.getElementById('author').value;

    try {
        // 現在のpostsデータを取得
        const response = await fetch('http://localhost:3000/posts');
        const data = await response.json();

        // 現在の最大IDを取得し、新しいIDを設定
        const maxId = data.reduce((max, post) => Math.max(max, parseInt(post.id)), 0);
        const newId = maxId + 1;

        // 新しい投稿を追加
        const postResponse = await fetch('http://localhost:3000/posts', {
            method: 'POST',
            headers: {
                'Content-Type': 'application/json'
            },
            body: JSON.stringify({ id: newId.toString(), title, author })
        });
        if (postResponse.ok) {
            // 投稿が正常に追加された場合、投稿一覧を再度取得
            fetchPosts();
            // フォームをリセット
            document.getElementById('postForm').reset();
        } else {
            console.error('投稿の追加に失敗しました');
        }
    } catch (error) {
        console.error('投稿の追加中にエラーが発生しました:', error);
    }
}
async function addPost(event): 非同期関数を定義します。この関数もasyncを使うことで、awaitを使うことができます。
event.preventDefault();: フォームのデフォルトの送信動作(ページのリロード)を防ぎます。
const title = document.getElementById('title').value;: フォームの入力フィールドからタイトルの値を取得します。
const author = document.getElementById('author').value;: フォームの入力フィールドから著者の値を取得します。
const response = await fetch('http://localhost:3000/posts');: 現在のpostsデータを取得します。
const data = await response.json();: 取得したデータをJSON形式に変換します。
const maxId = data.reduce((max, post) => Math.max(max, parseInt(post.id)), 0);: 現在の最大IDを取得します。
const newId = maxId + 1;: 新しいIDを設定します。
const postResponse = await fetch('http://localhost:3000/posts', { method: 'POST', headers: { 'Content-Type': 'application/json' }, body: JSON.stringify({ id: newId.toString(), title, author }) });: 新しい投稿をJSON Serverに追加します。
if (postResponse.ok) { fetchPosts(); document.getElementById('postForm').reset(); }: 投稿が正常に追加された場合、投稿一覧を再度取得し、フォームをリセットします。


まとめ
asyncとawaitを使うことで、非同期処理を直線的に書くことができ、コードが読みやすくなります。
fetchは、サーバーからデータを取得するためのモダンな方法で、Promiseを返します。
このコードでは、fetchを使ってJSON Serverからデータを取得し、新しい投稿を追加する方法を示しています。
